I purchased an original US Money Money machine a few years ago that ended up dropped by the shipping company. Both monitor brackets had been ripped off and the base and back panel had separated. The electrics, however, survived and when tested the game ran. I managed to find a converted EU Money Money cabinet in the UK that came over with "The Big Move" so at last I have a replacement cabinet to use to fully restore a Money Money. The project entails making one complete good working US Money Money based on the parts from the two cabinets.
|
|
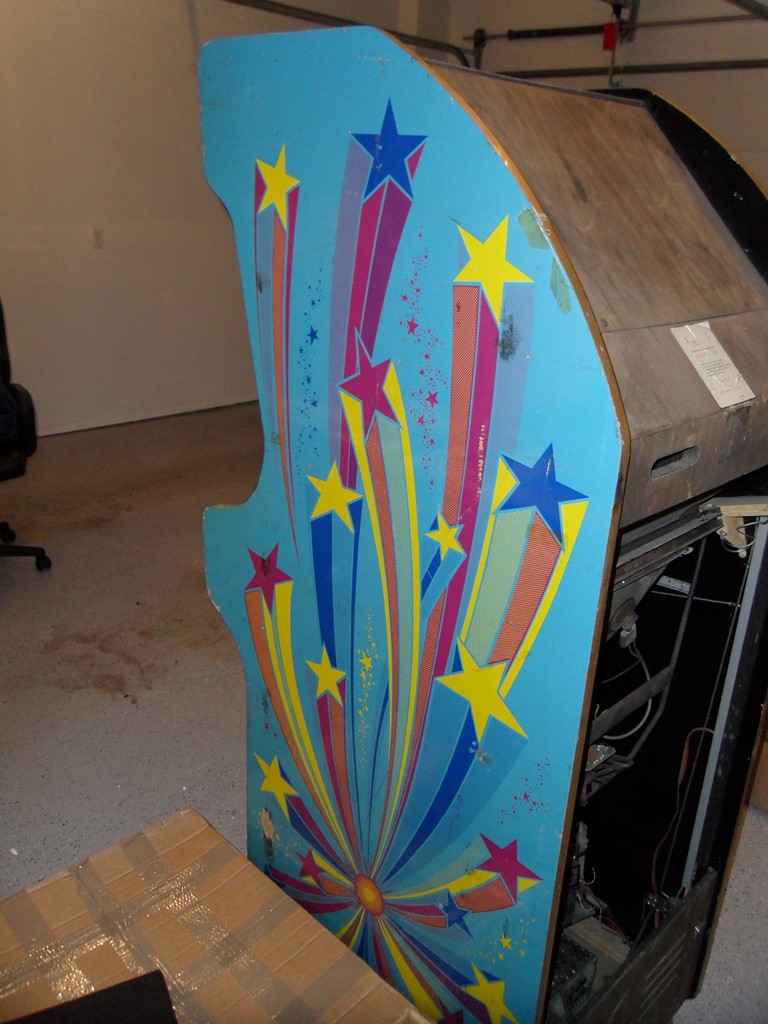
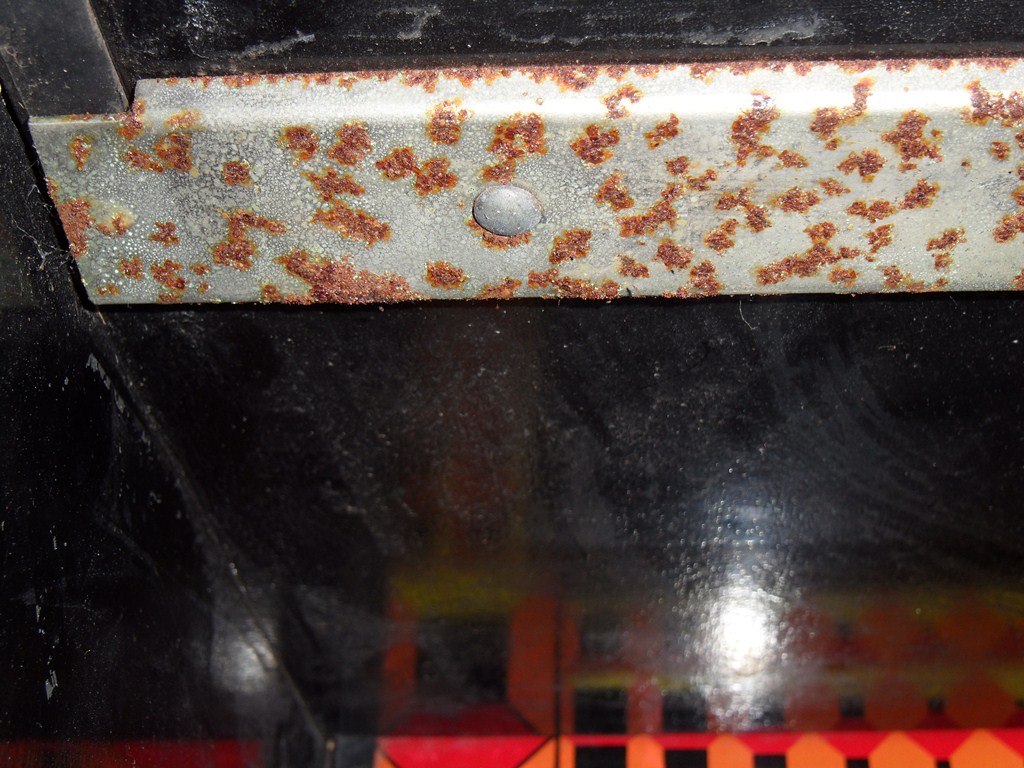
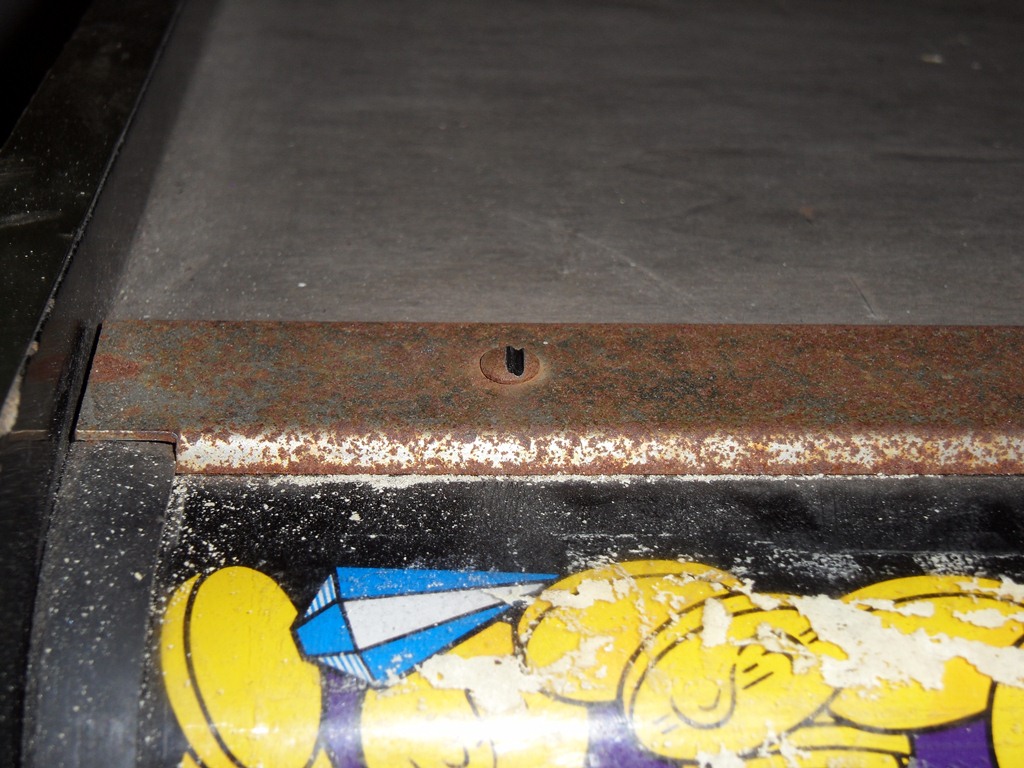
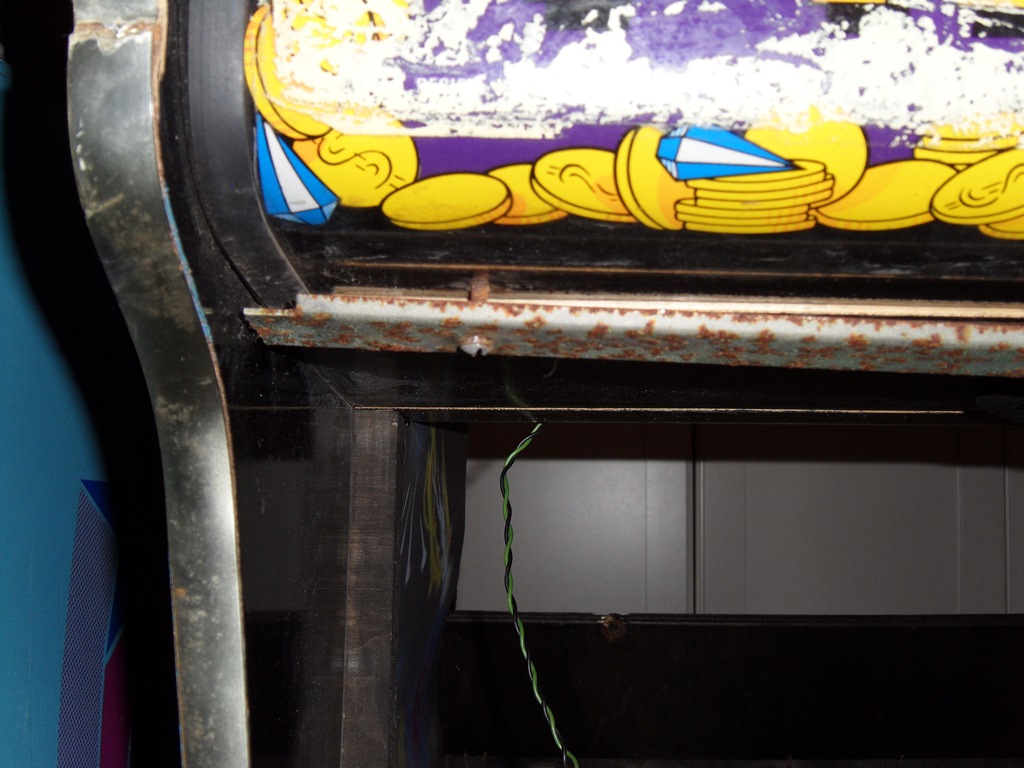
The cabinet wood work is generally complete and in tact, though all the metal work has heavy rust on it.
|
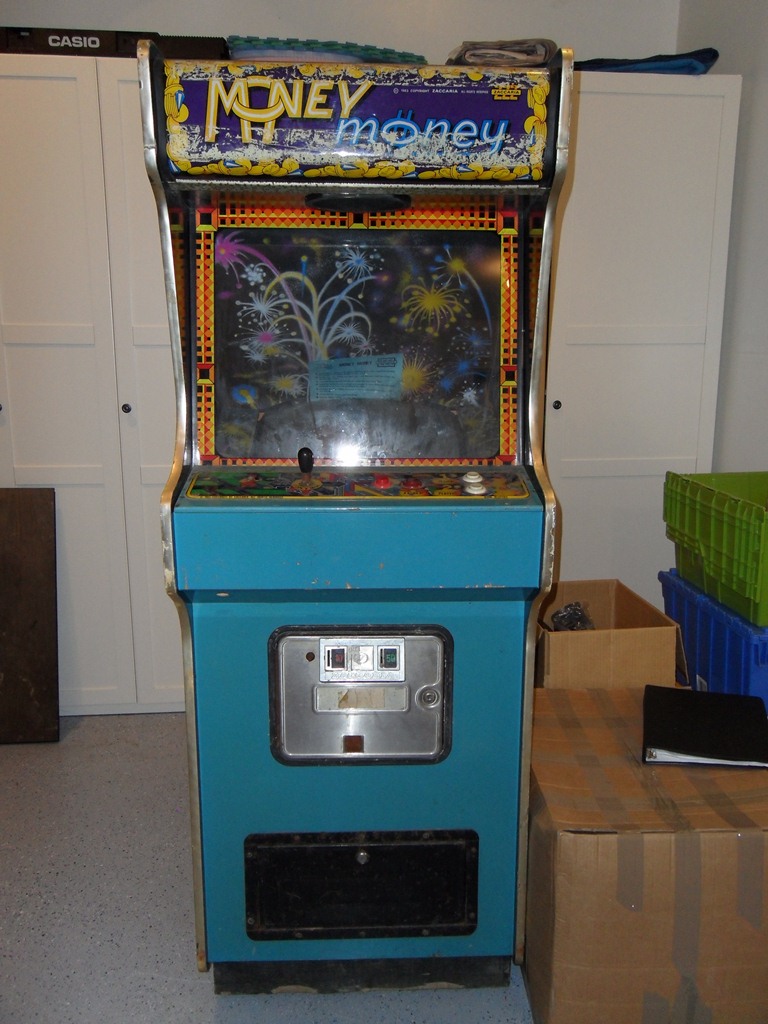
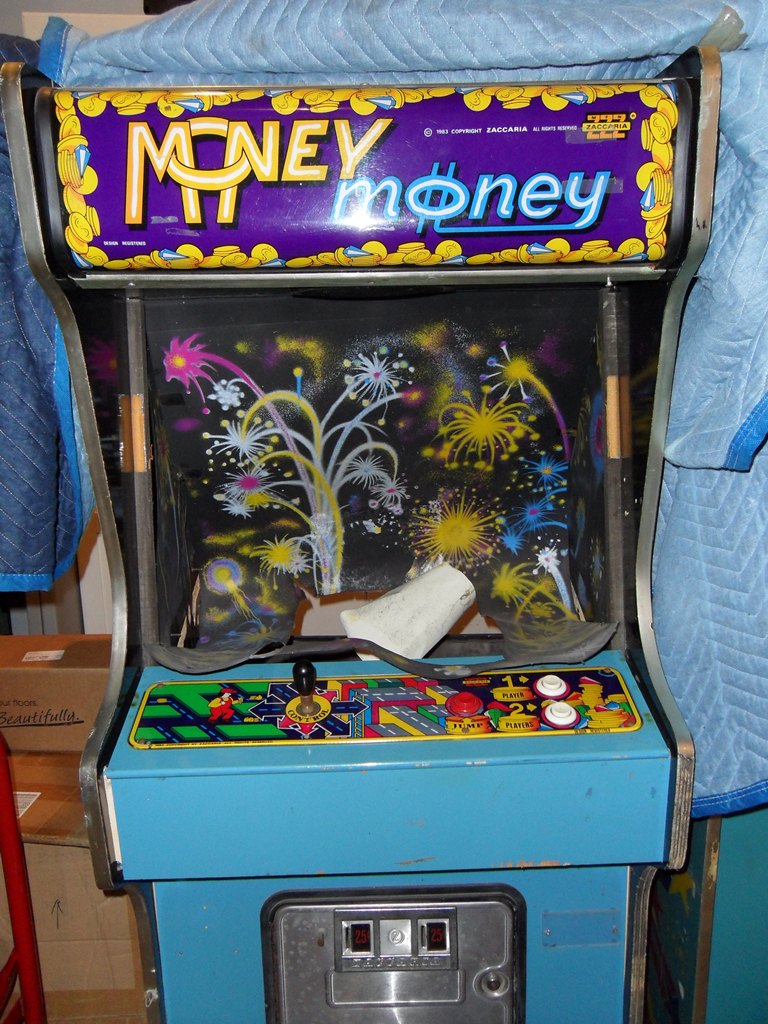
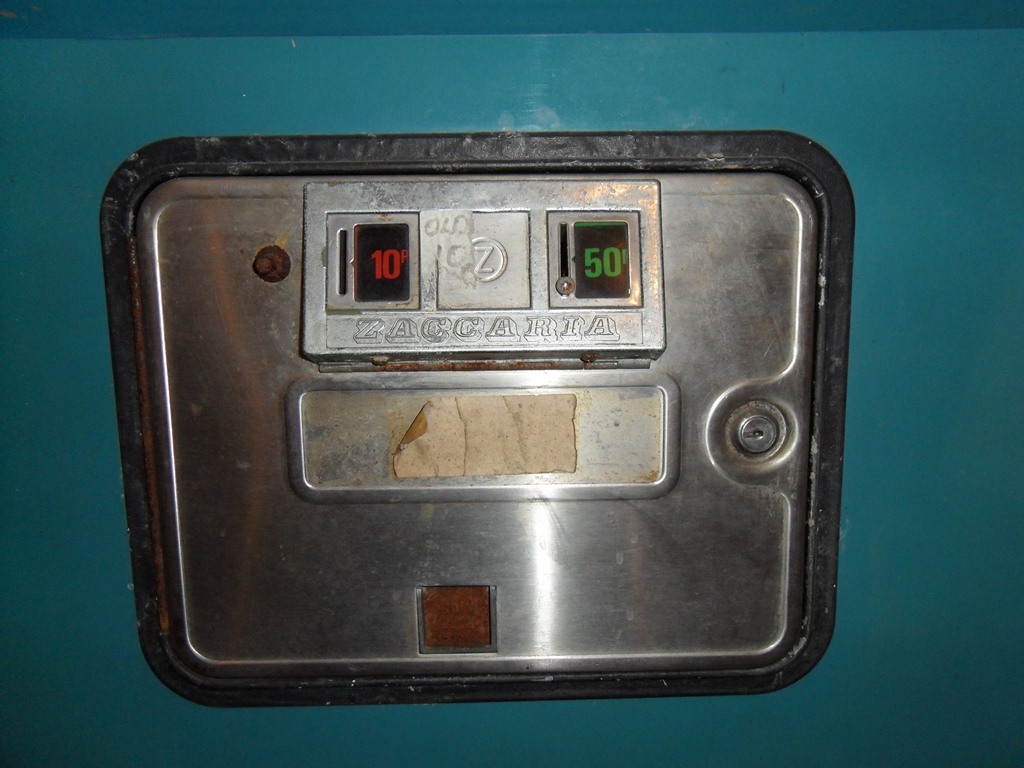
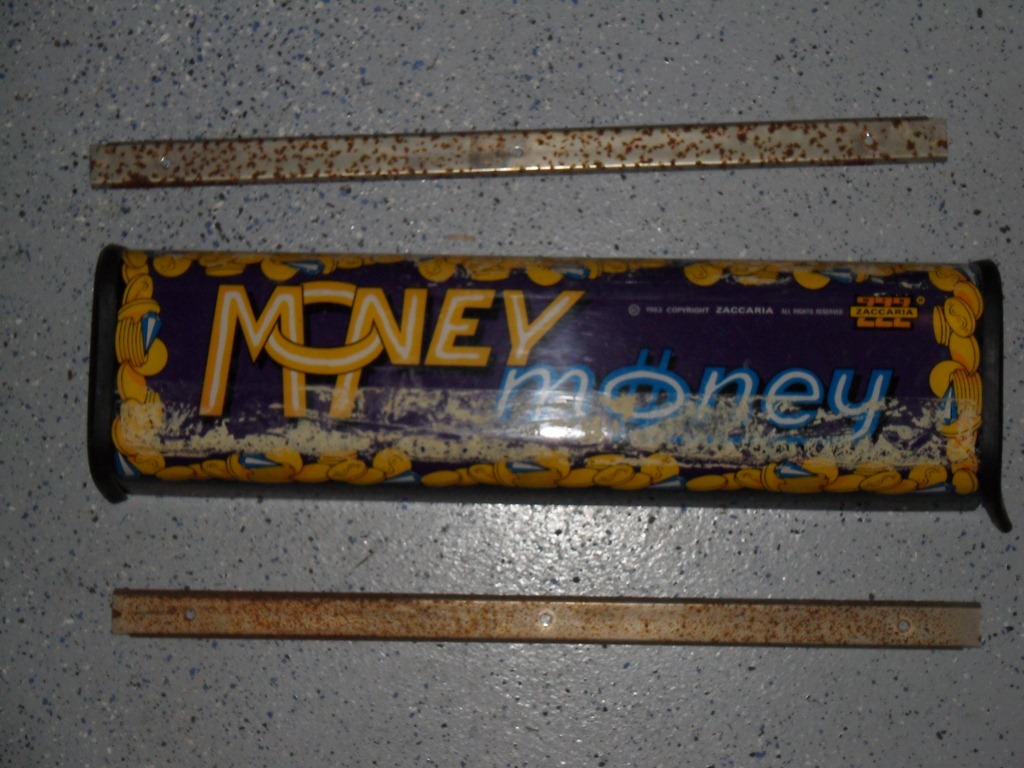
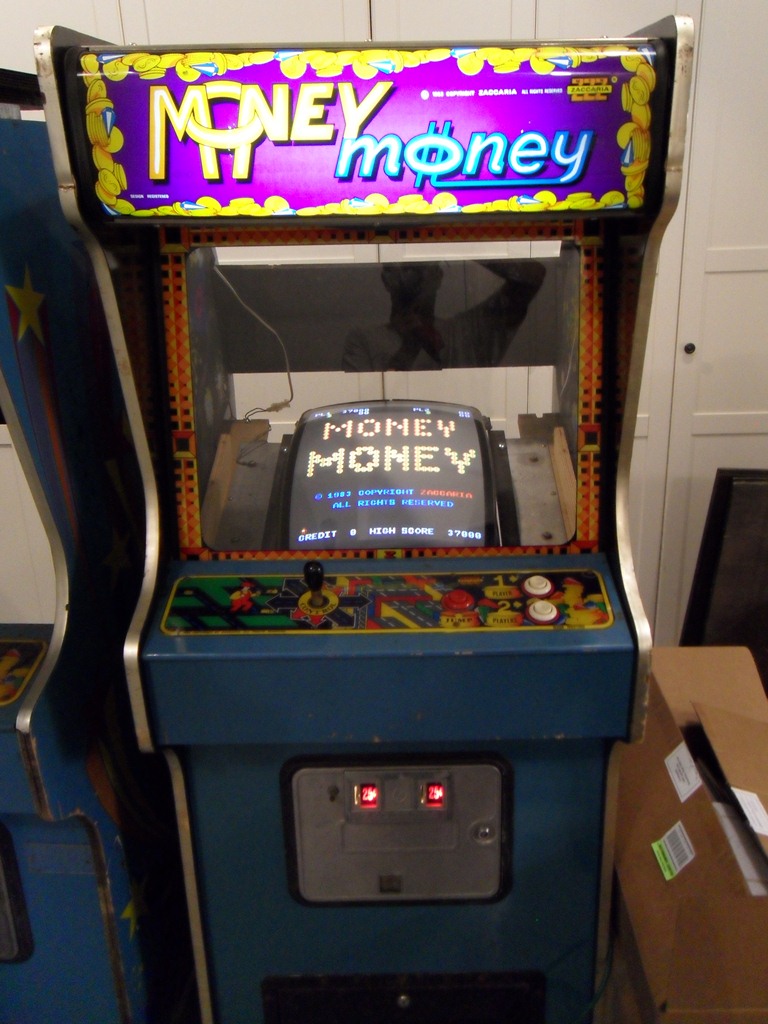
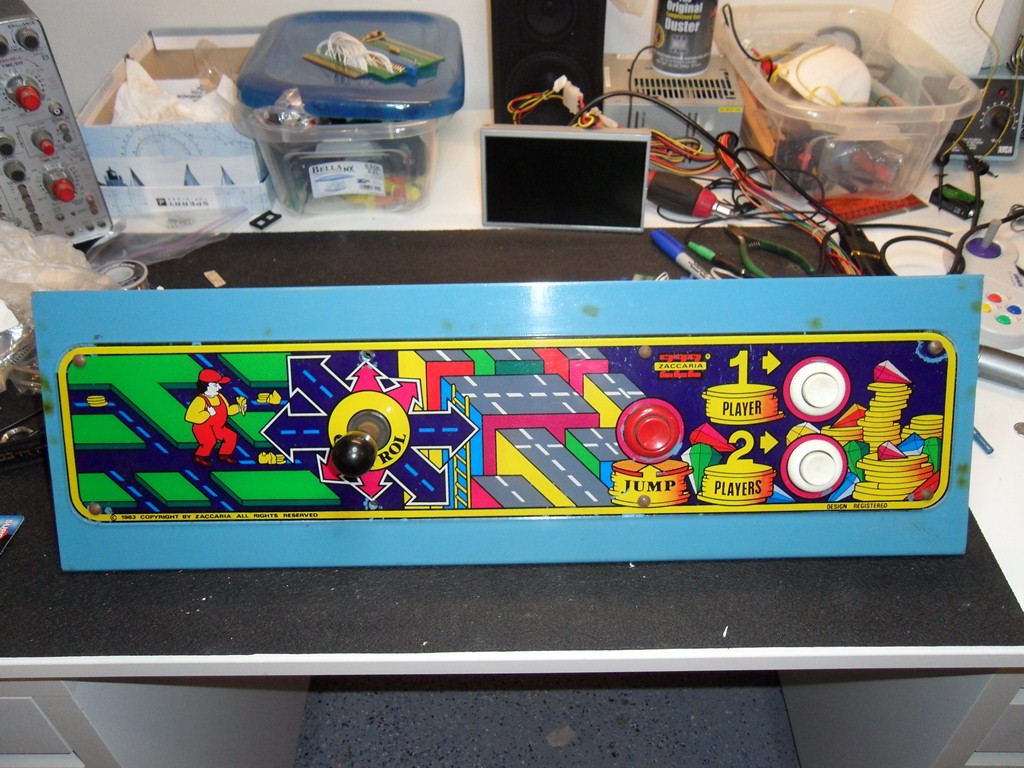
The control panel is the Money Money control panel drilled to add another button. The marque is original but is cracked at the top with double sided tape residue over it (presumably how the new games marque was attached). The cardboard surround has been cut out to fit the monitor that's been rotated to be horizontal.
|
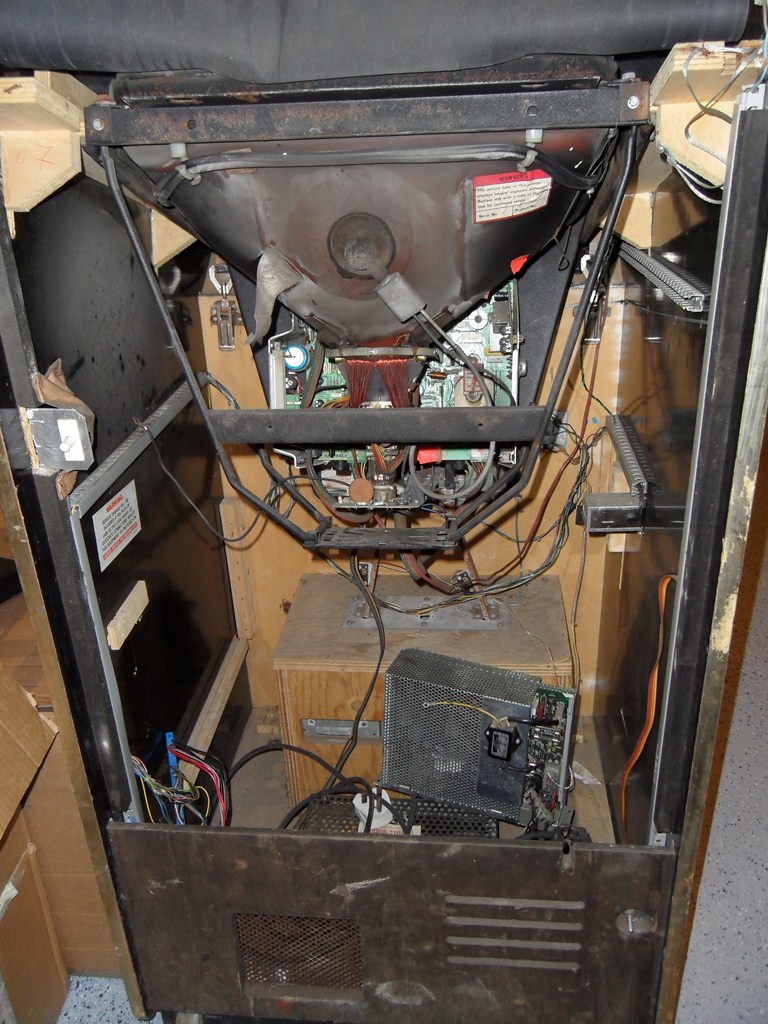
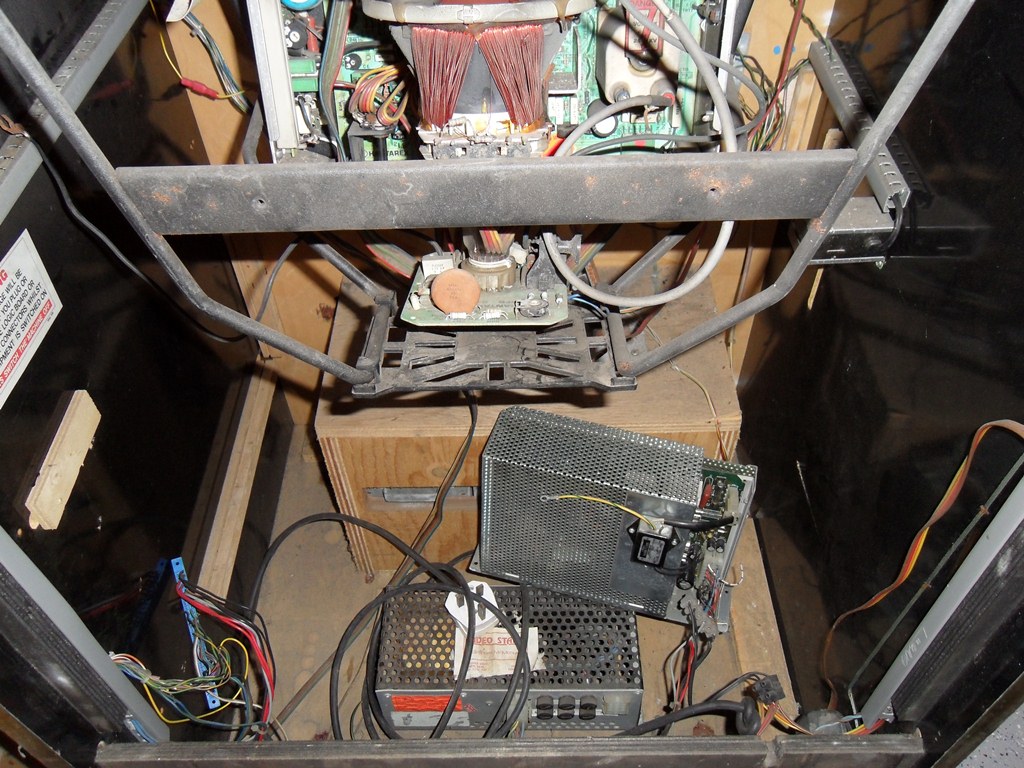
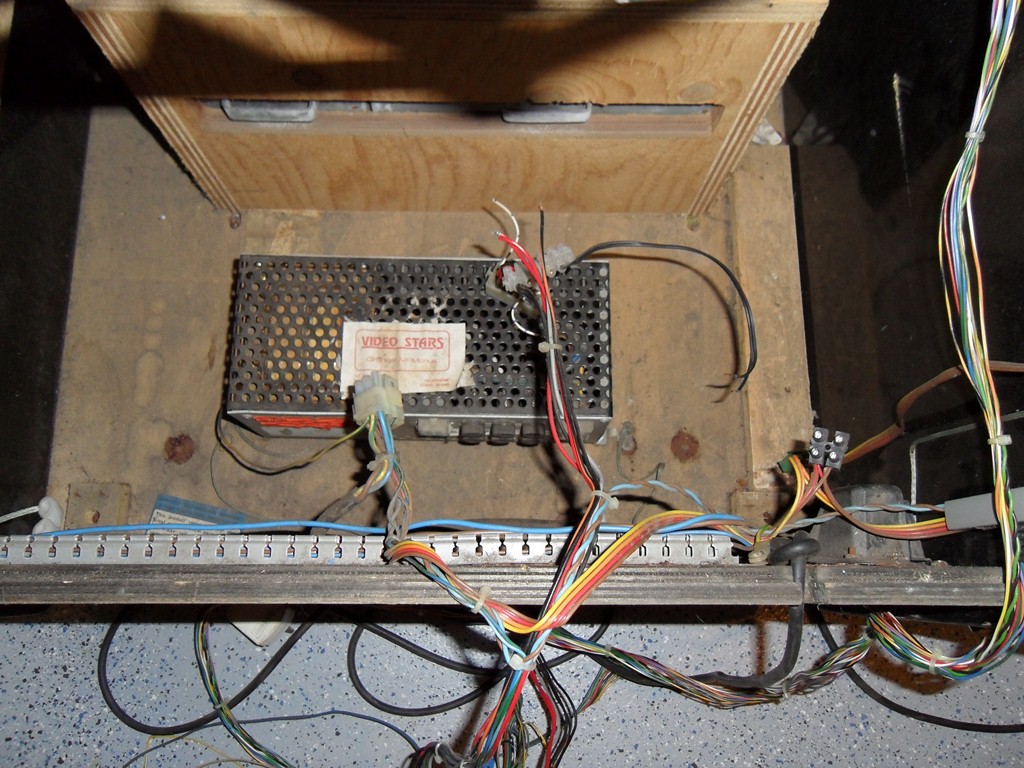
Internally, the mains side wiring is in tact and the original EU power supply is present though the low voltage (game PCB) portion of it is no longer used - all the original wiring for the low voltage supply is gone. In it's place a Taito power supply has been hacked in and tapped off the monitor supply.

|
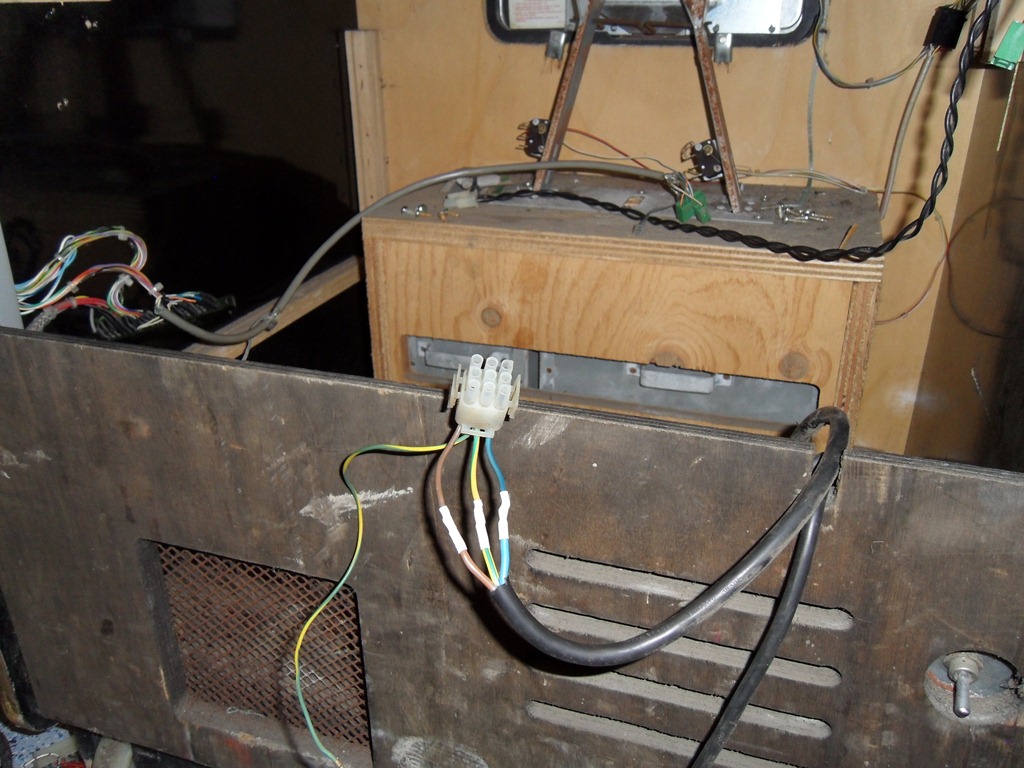
Note that this EU cabinet is wired for the Hantarex 900 series monitor using the standard Hantarex power connector with dual 120V/240V supplies. The US cabinet is Hantarex 900E/USA based using a single 120V WG in-line power connector. I'll be keeping the US configuration and using the 900E/USA monitor from the US cabinet.

|
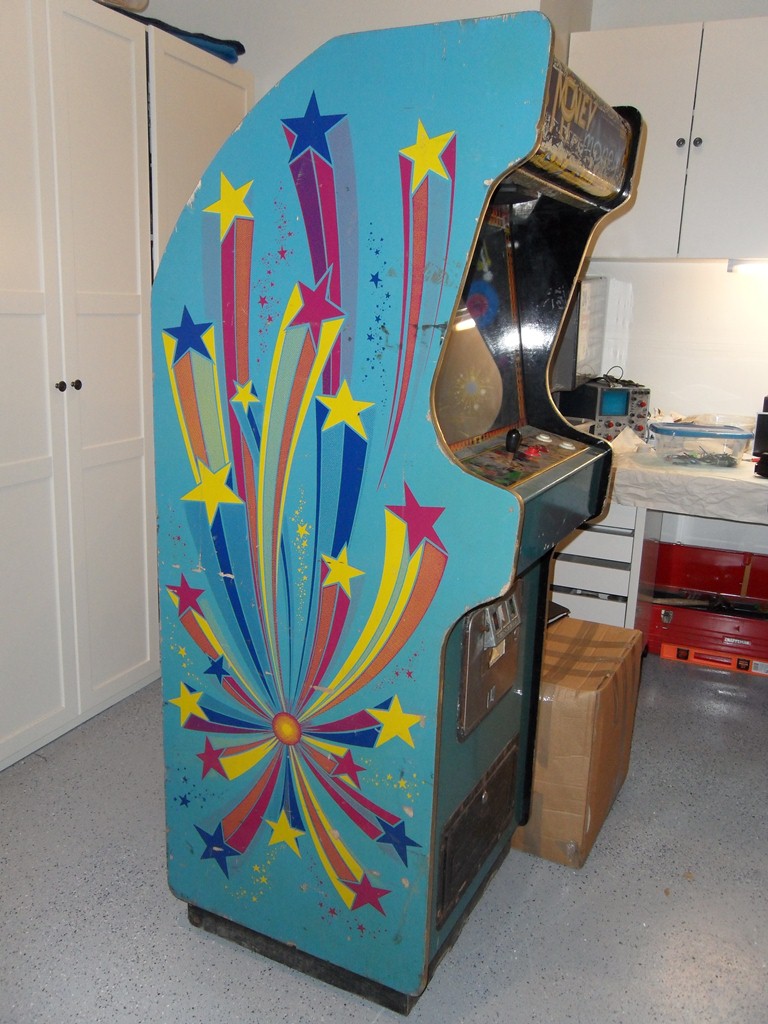
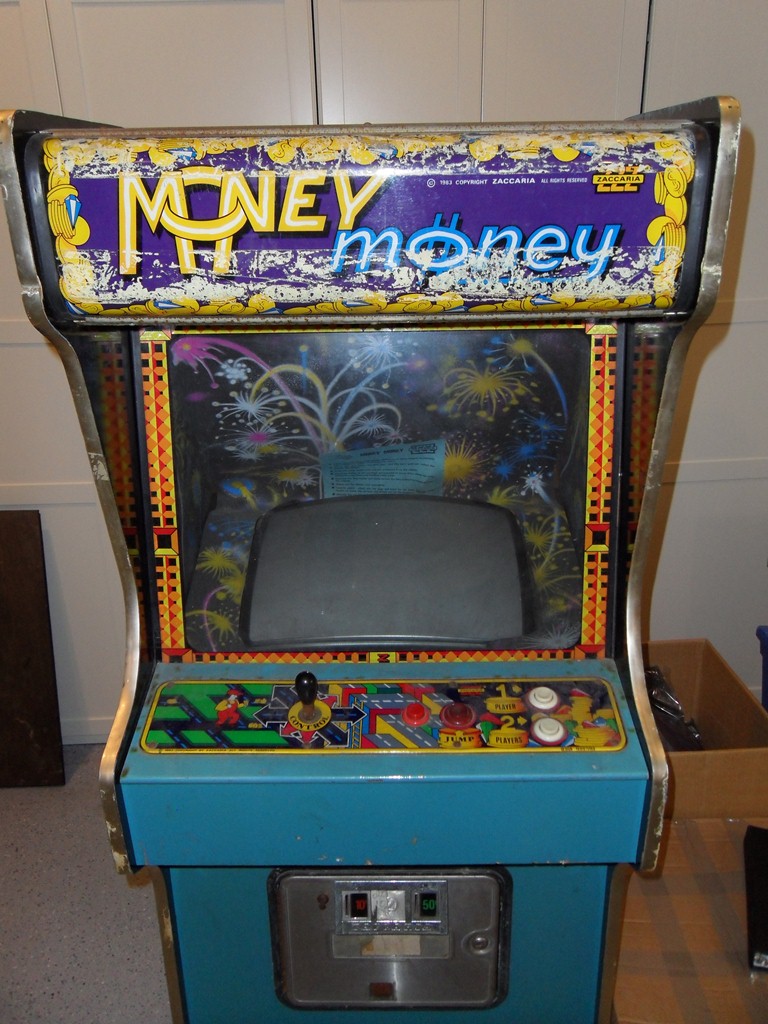
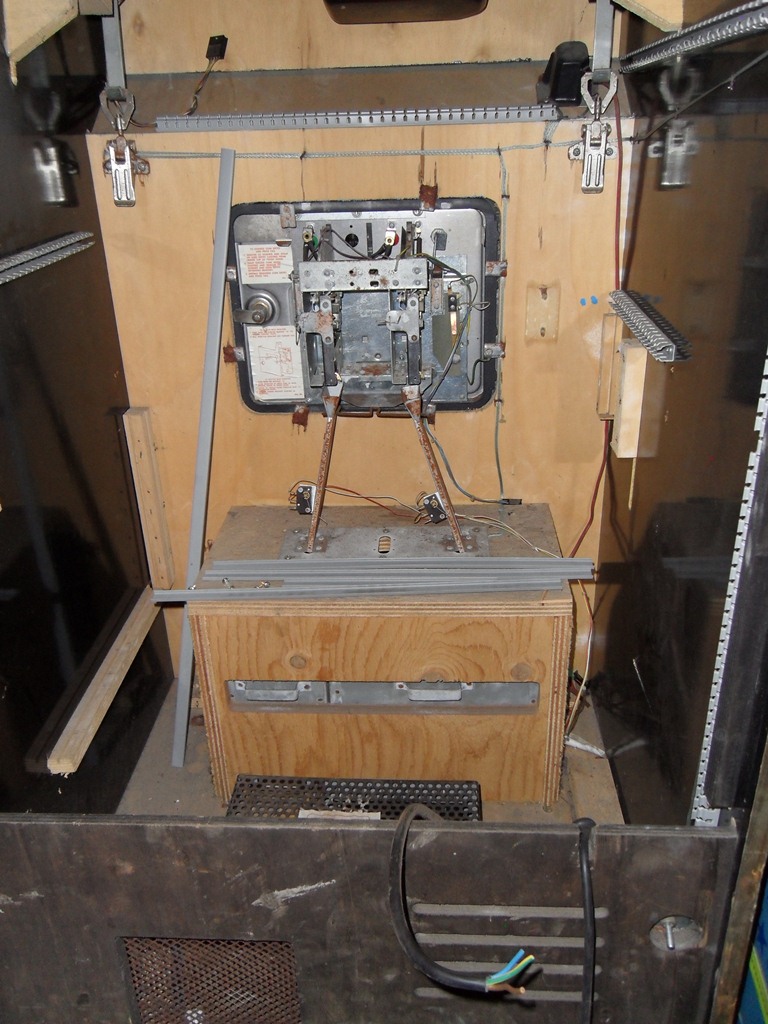
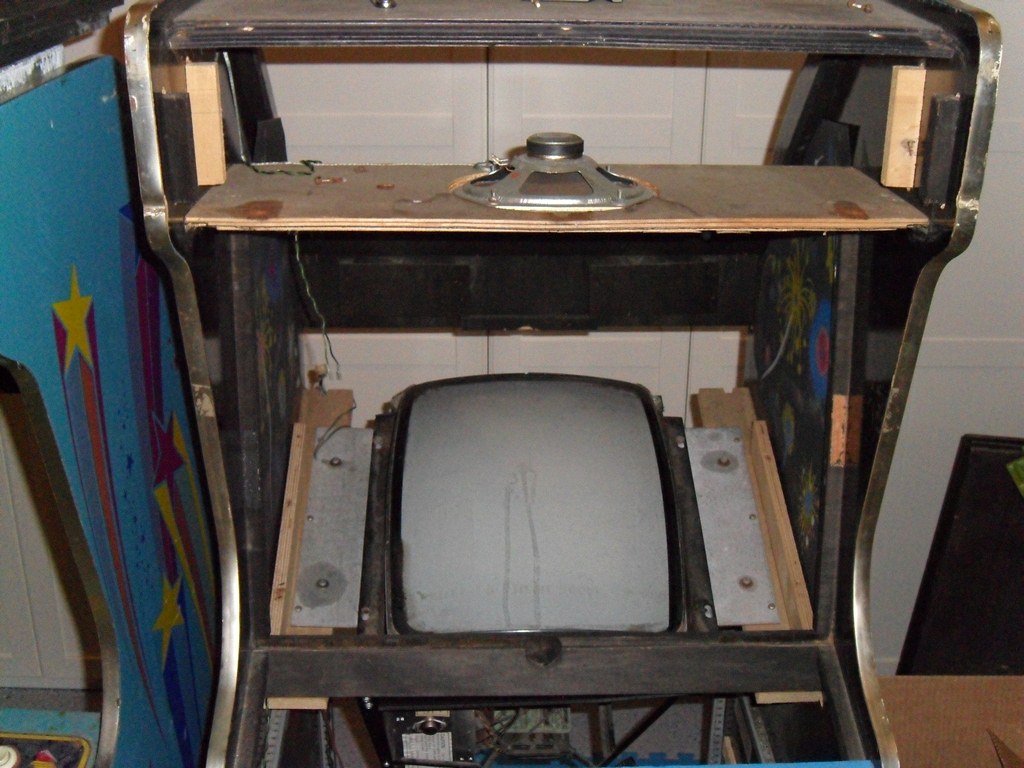
Marque and control panel are good and less faded that the EU one. Both monitor brackets have been ripped off and the base, the back panel and control panel woodwork has split off the side panels (the ratchet strap is holding the base together). Internally, the op has hacked the mains input to move the power switch to the top of the cab, thus I'll be keeping the in tact mains side from the EU cabinet.
|
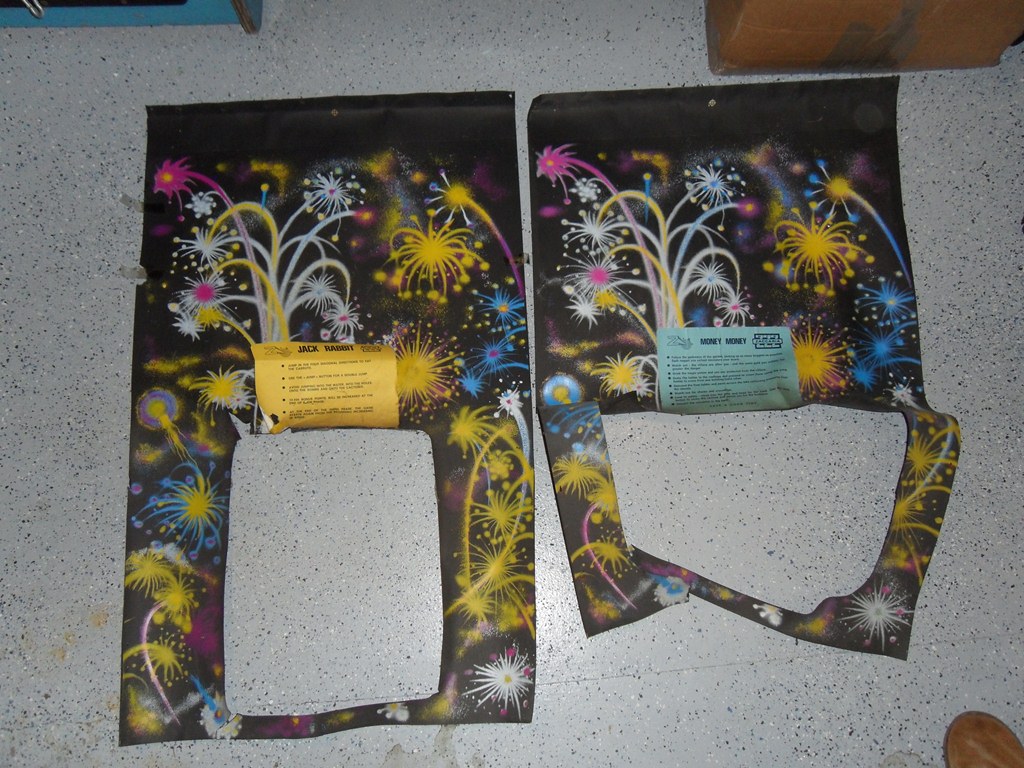
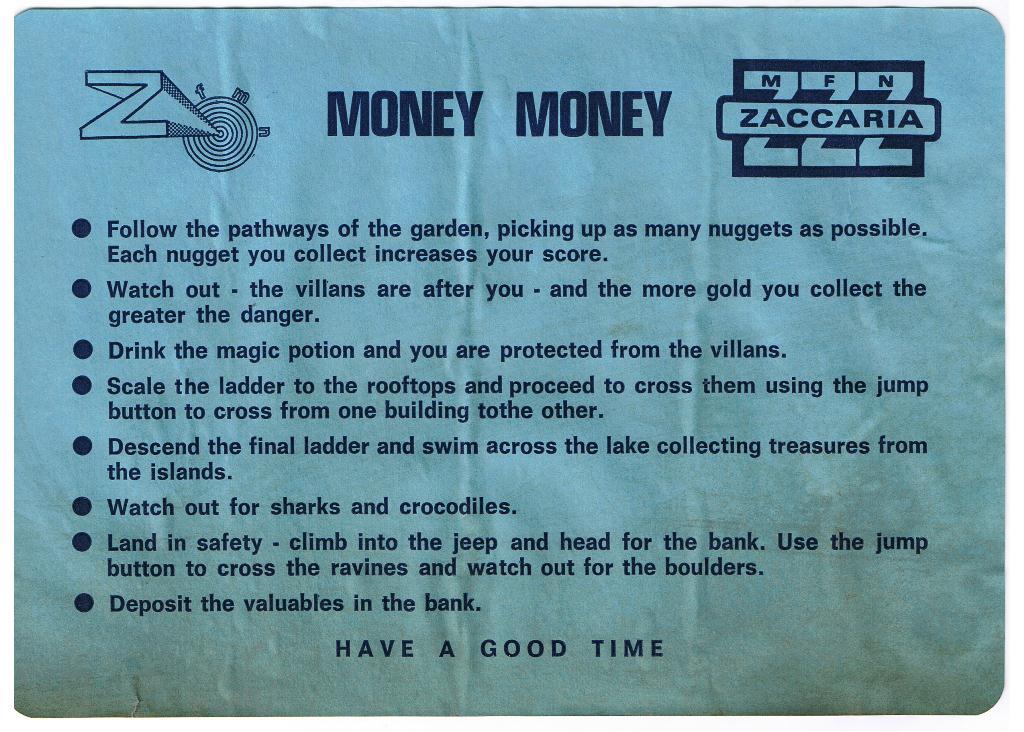
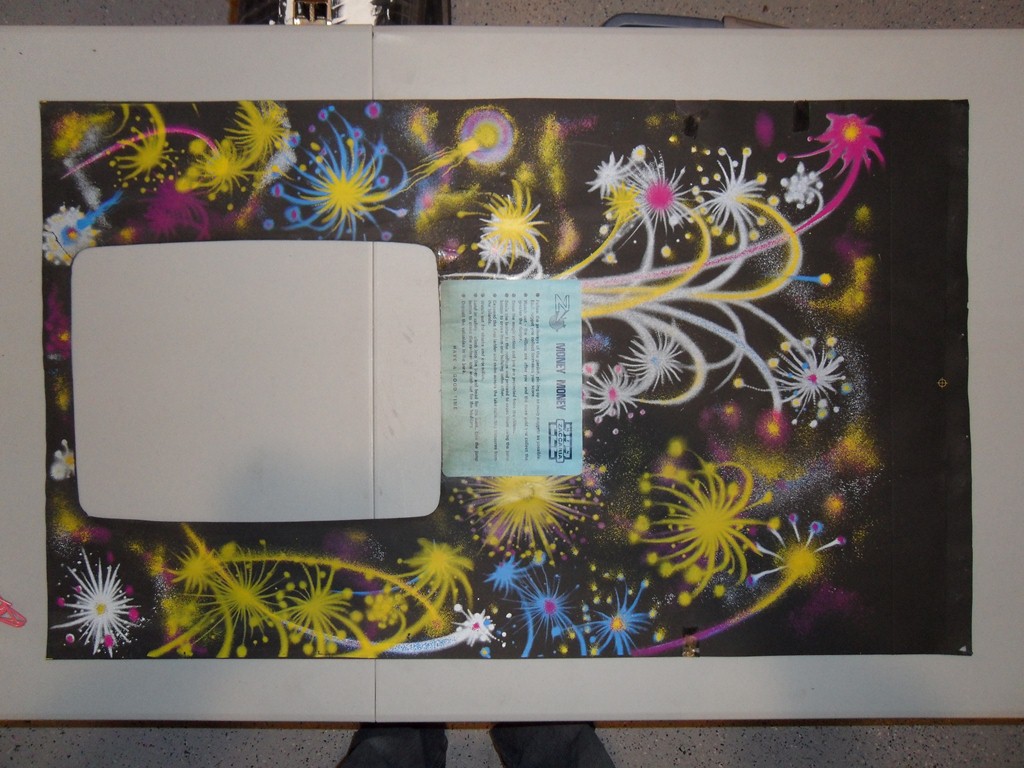
Neither surround is great but at least the US one is complete. This will be the one to restore along with the Money Money instruction sheet from the EU cabinet. Restoring the cardboard surround will be the last step so these are put away for now.

|
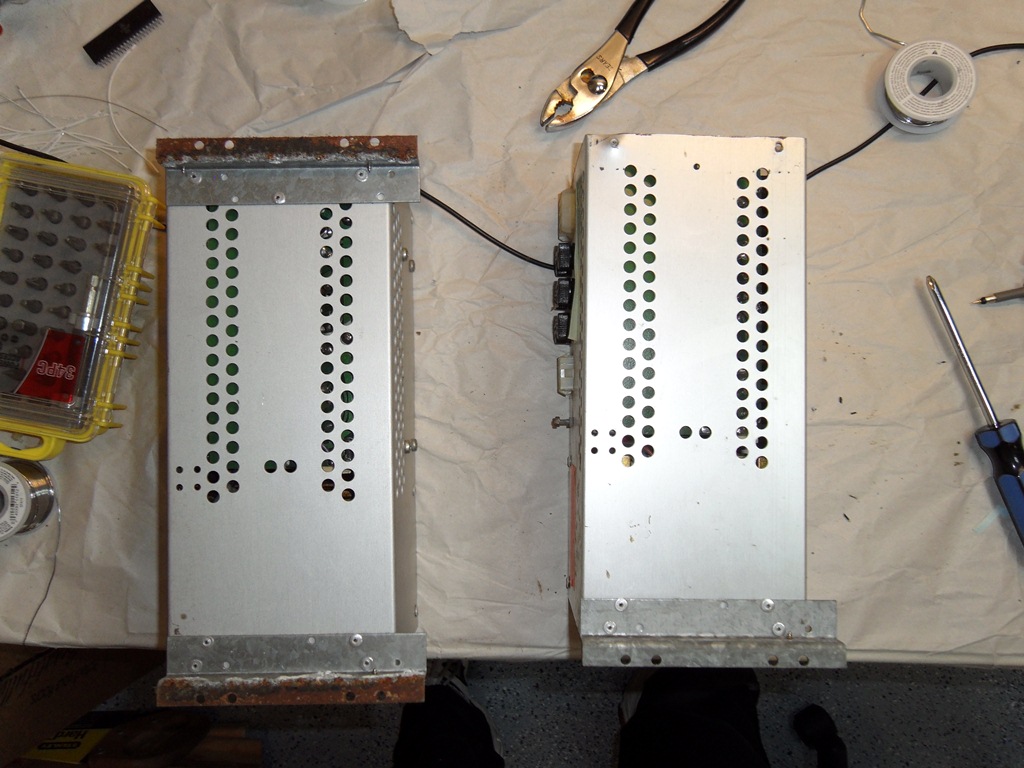
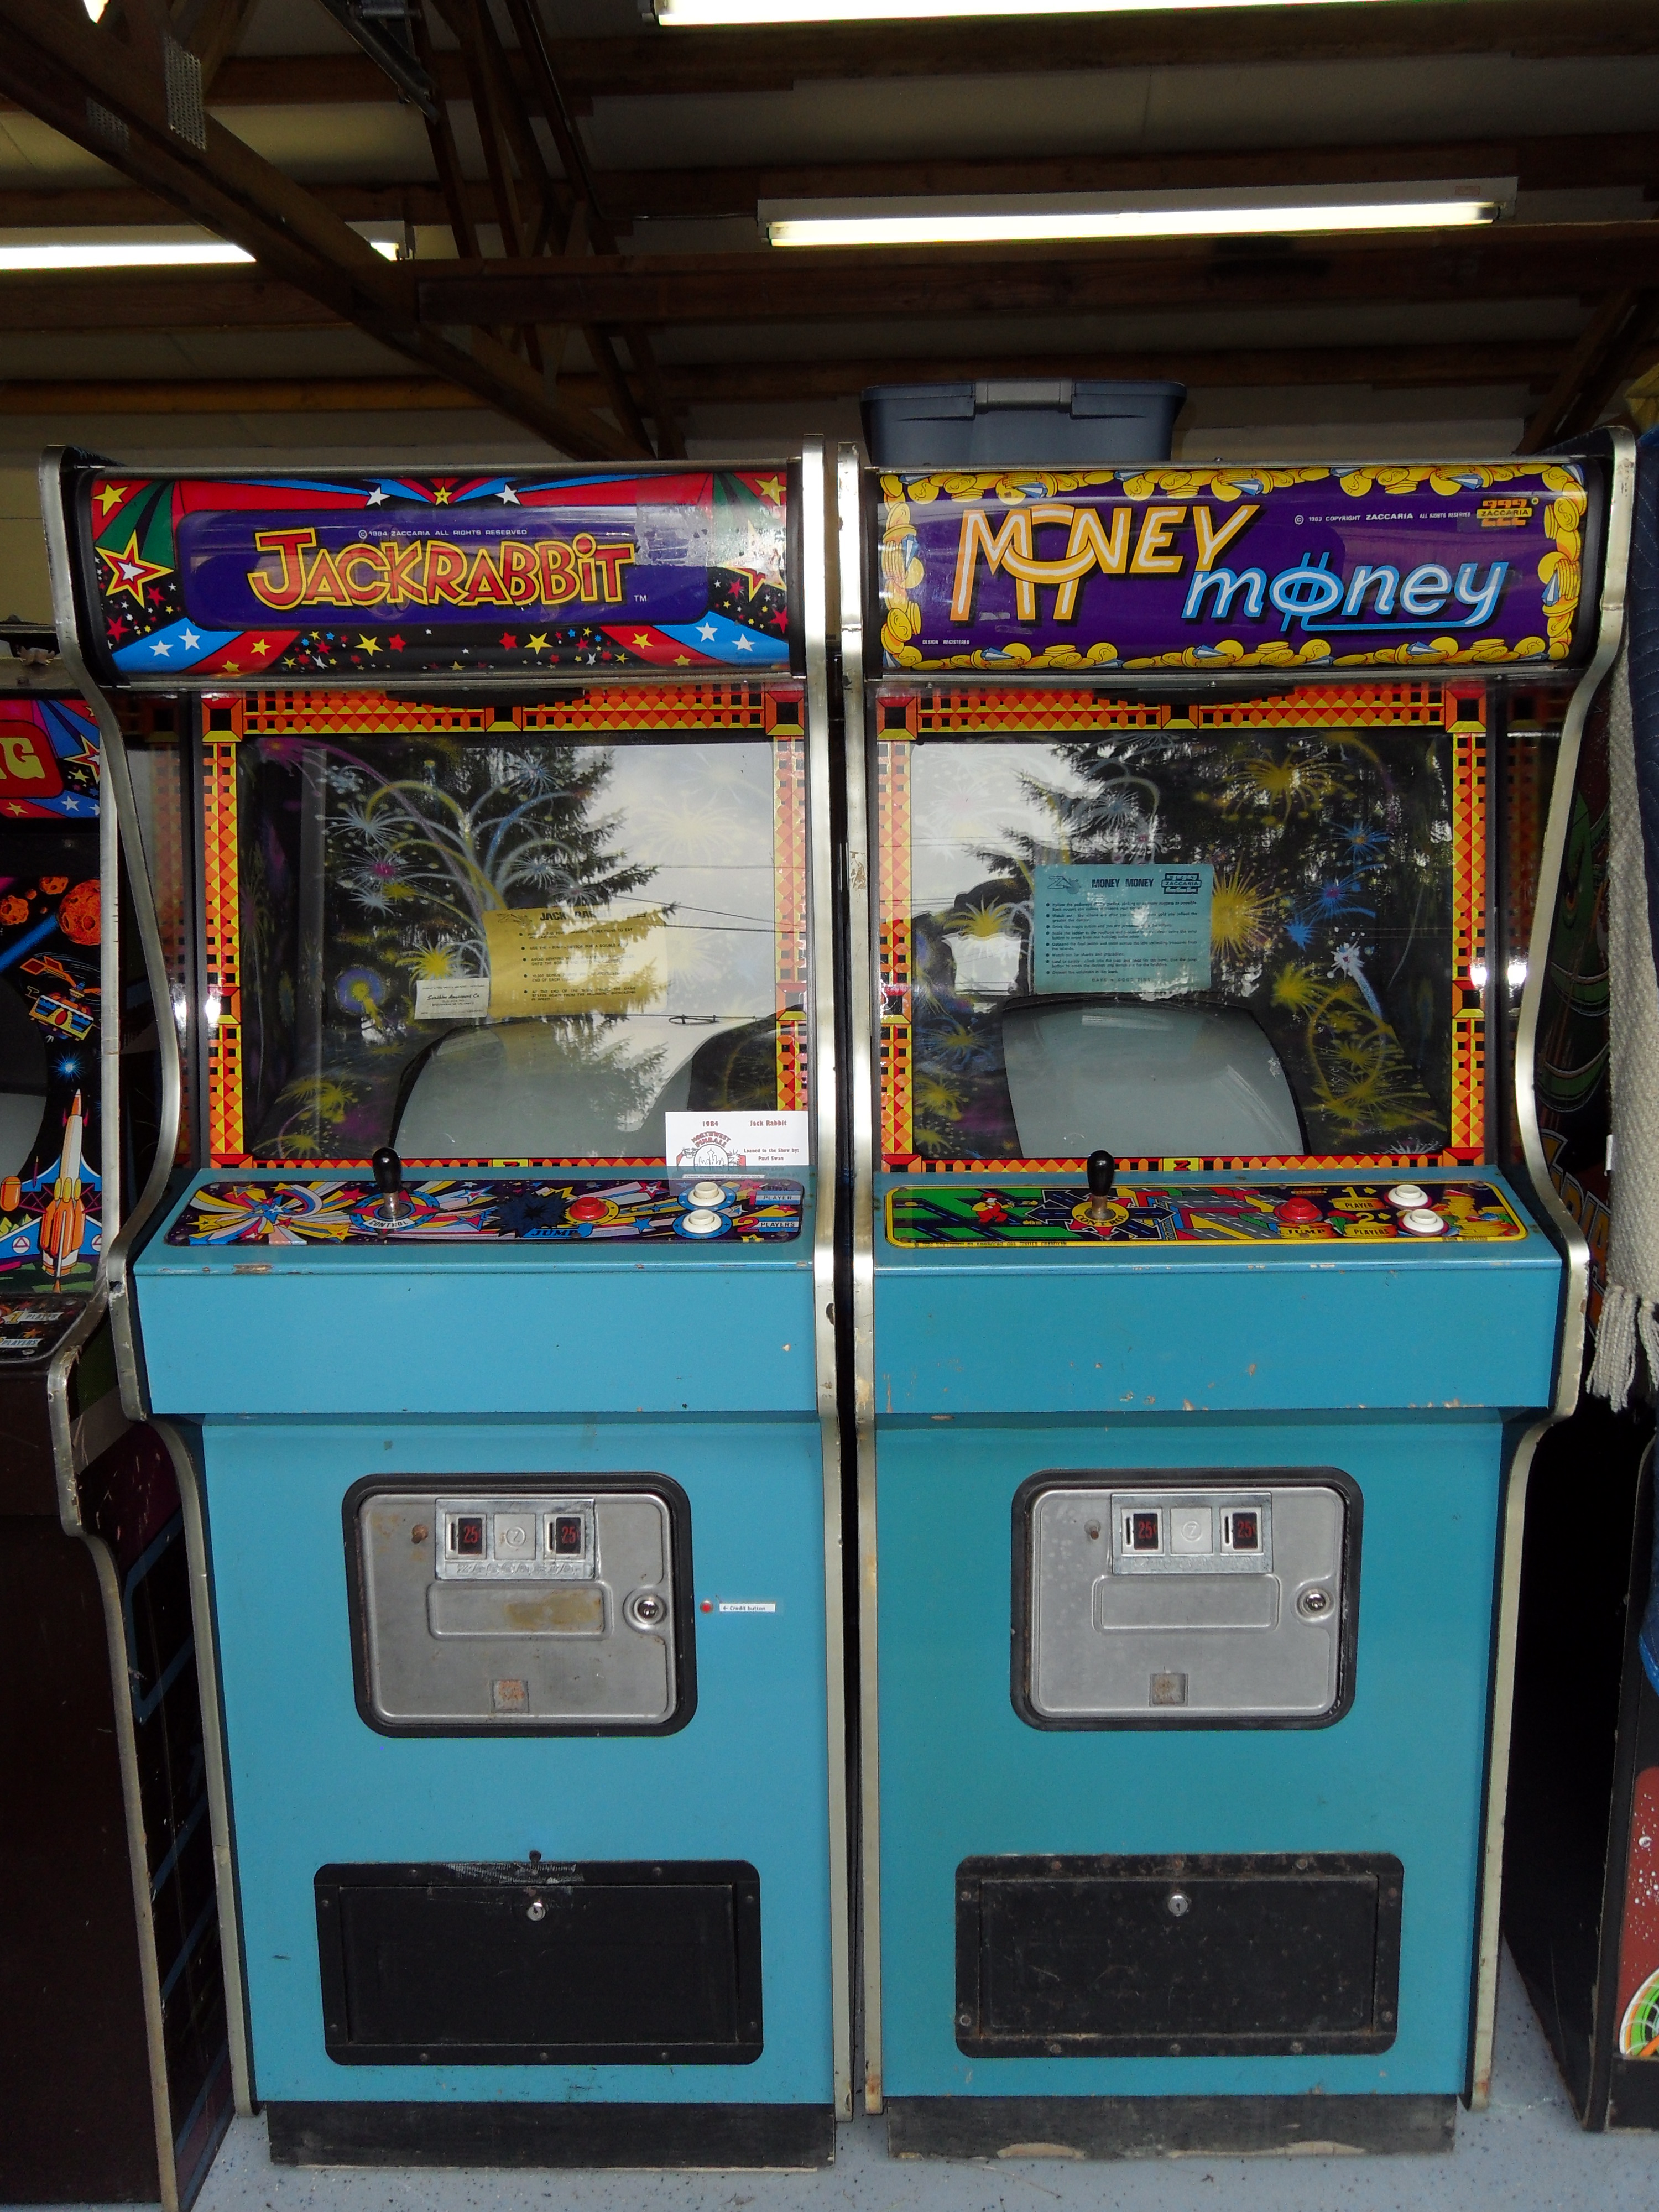
Both cabinets side-by-side with US control panel moved over to the EU cabinet. The height difference is because the US cabinet is missing the base.
|
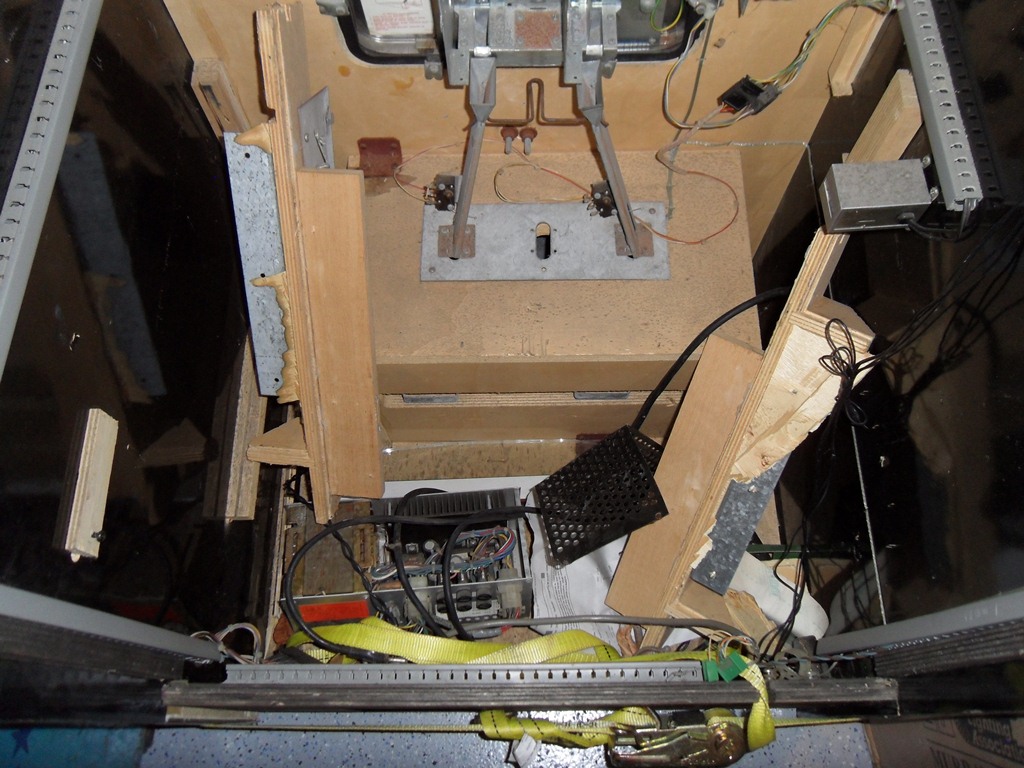
The Taito power supply that had been hacked into the EU cabinet is removed along with the game PCB wiring.
|
The service panel and coin counter are removed from the EU cab.
|
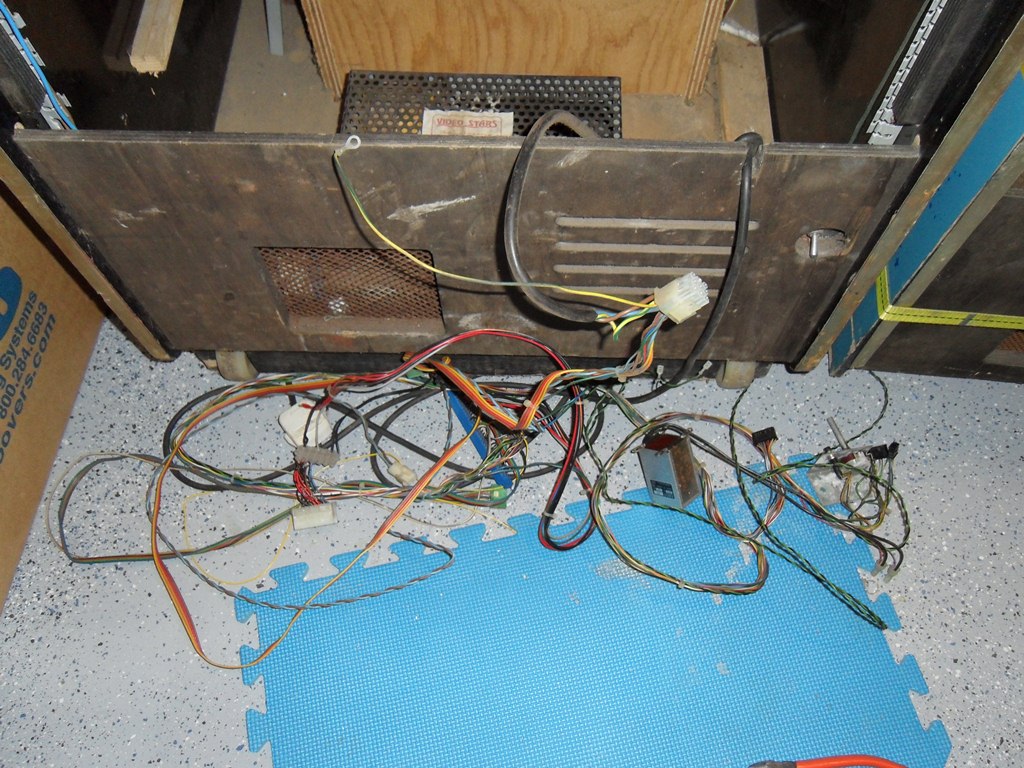
All the EU wiring is out and remains connected only by the mains input.
|
All the old hacked EU wiring out with just the mains input, the back door interlock and power switch remaining. The US cabinet does not have a back door interlock switch.

|
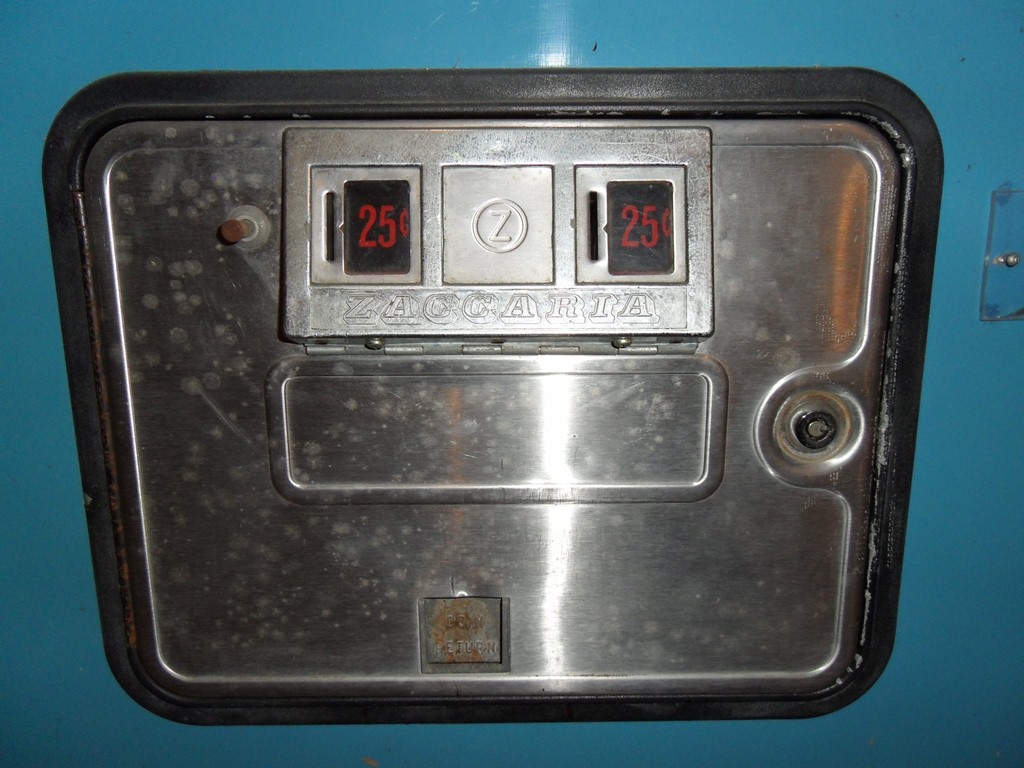
The EU coin door is much more rusty than the US one so with both cabs empty it was easy to change them over (the flash makes the US one look more spotted than it actually is).


|
The US cabinet wiring all out of the US cabinet and installed in the EU cabinet, only needing the line in connecting to complete it (soldered and shrink wrapped).
|
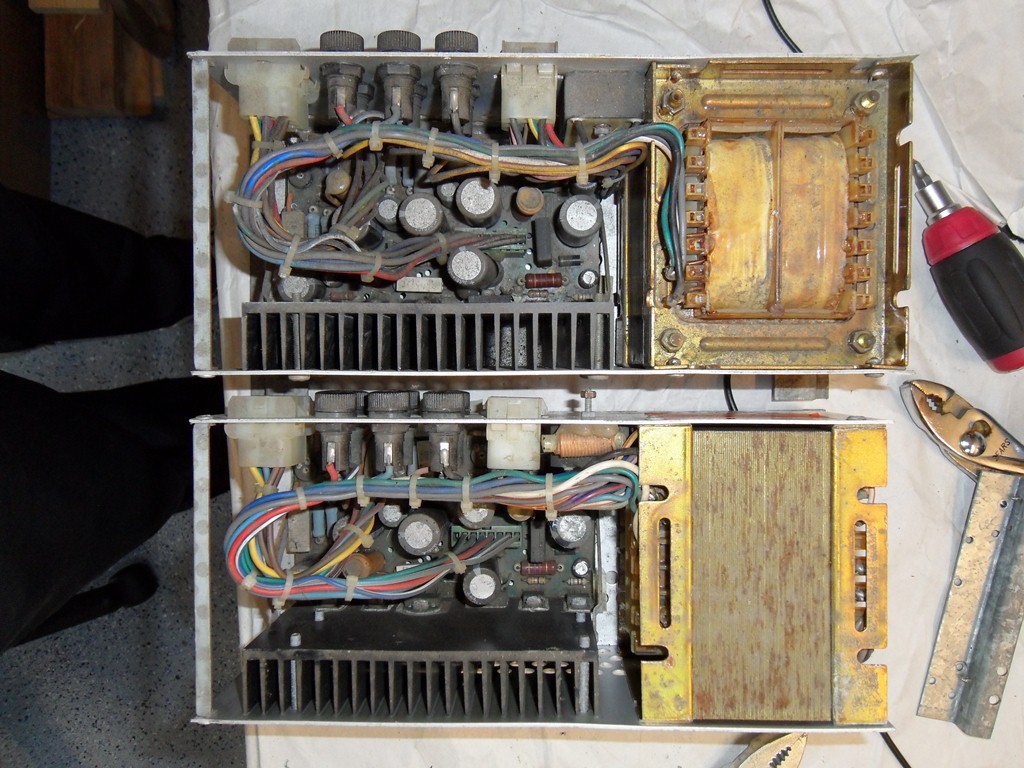
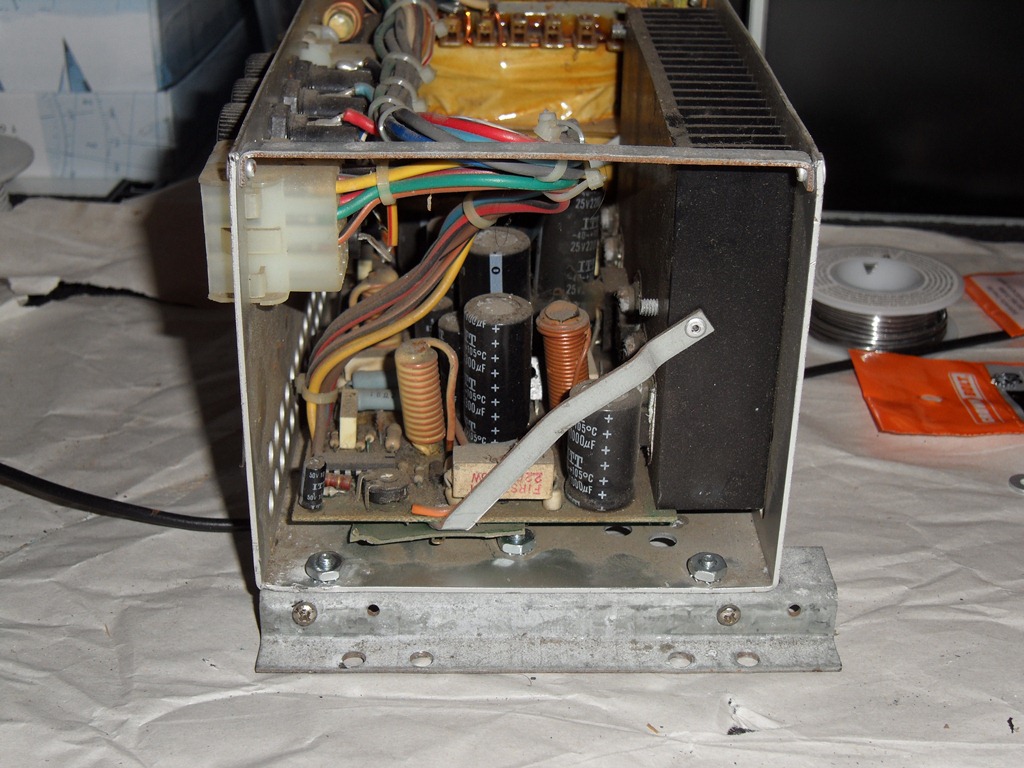
The EU and US power supplies are almost the same but the transformer is rotated because the line in is on the other side for the 240V input. The cabinet mounting bracket was ripped off the US supply when the cabinet was dropped. Need to remount it with some nuts & bolts.


|
|
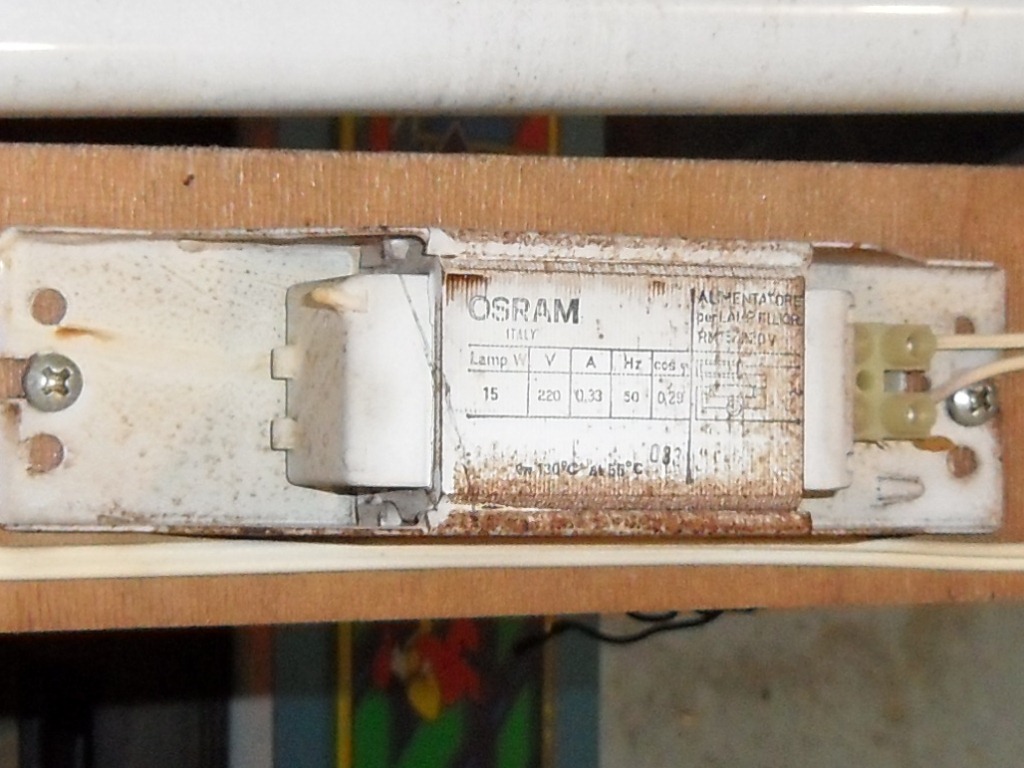
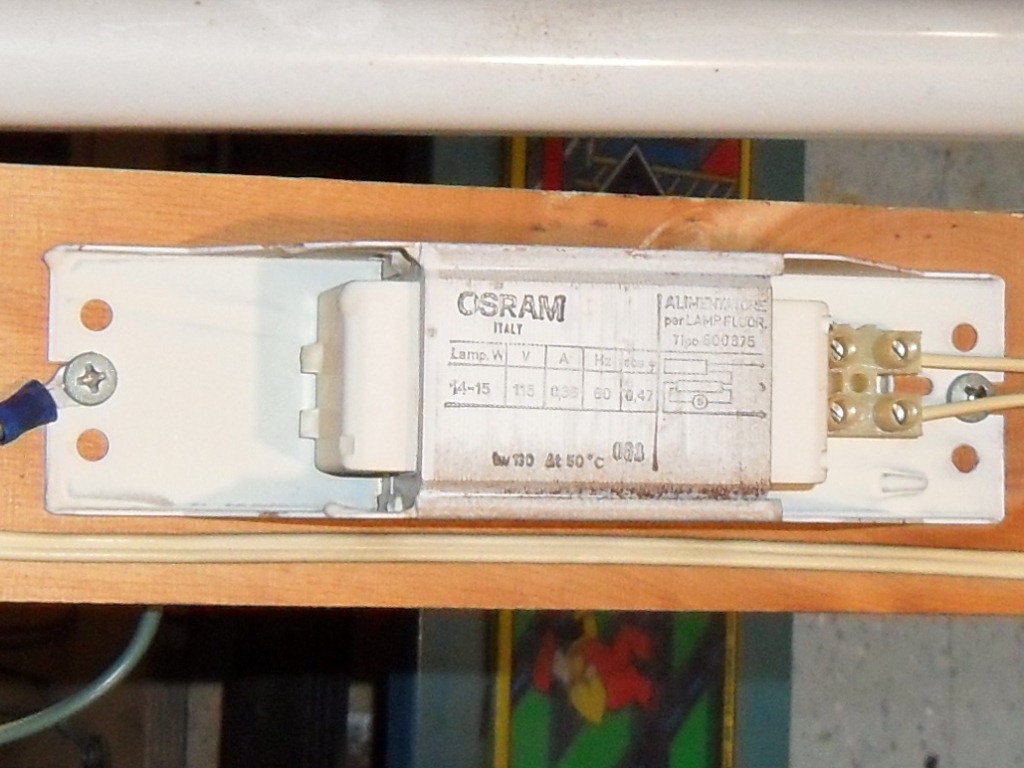
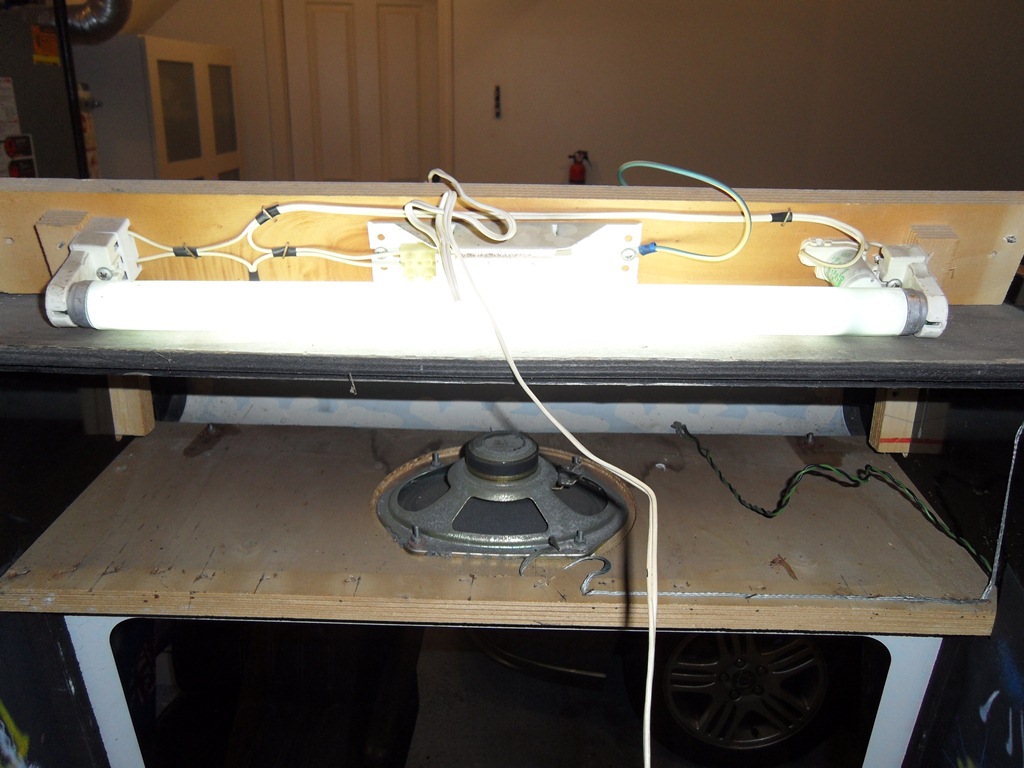
The marque lights look the same except the tube is blown on the EU one and it's more rusty. But look closer - the EU marque light is 220V and the US marque light is 115V so we need to use the US one with the US power supply in the EU cabinet.

|
The US marque is easily removed from the cabinet. It's much less faded and not cracked like the EU marque. However, the carriage bolts on the EU cabinet are rusted to the nuts with no easy way to get a grip on the top to undo it. Need to come back to that later :(

|
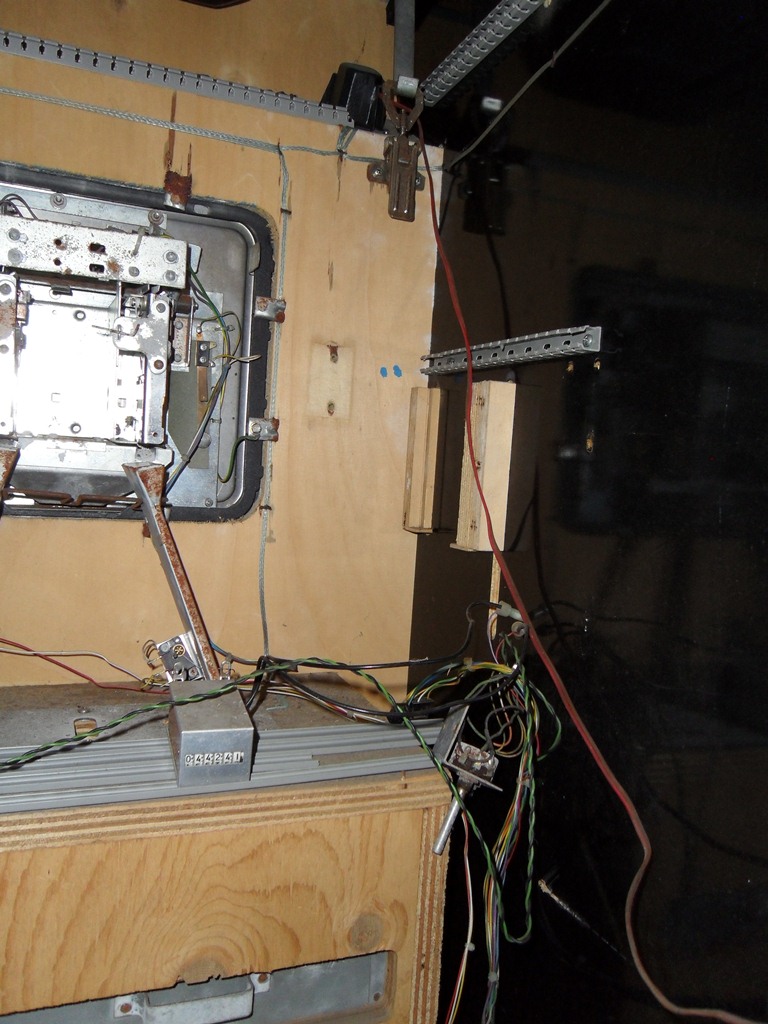
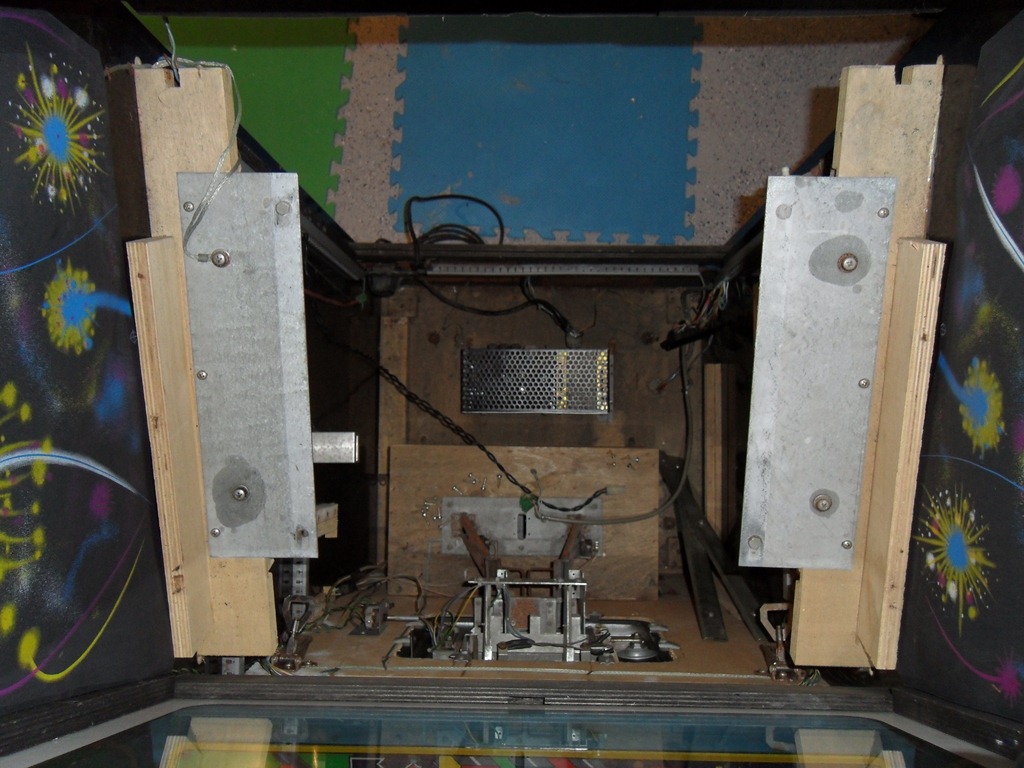
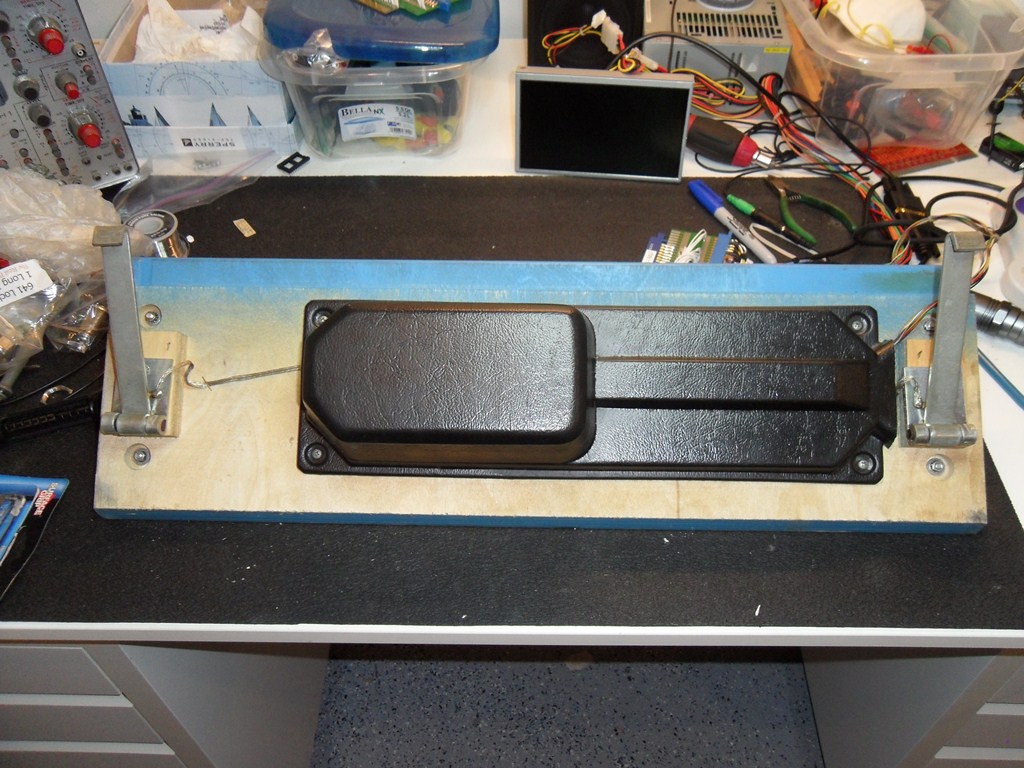
Moving the vertical monitor mount brackets from the pieces from the US cabinet to the EU cabinet.
|
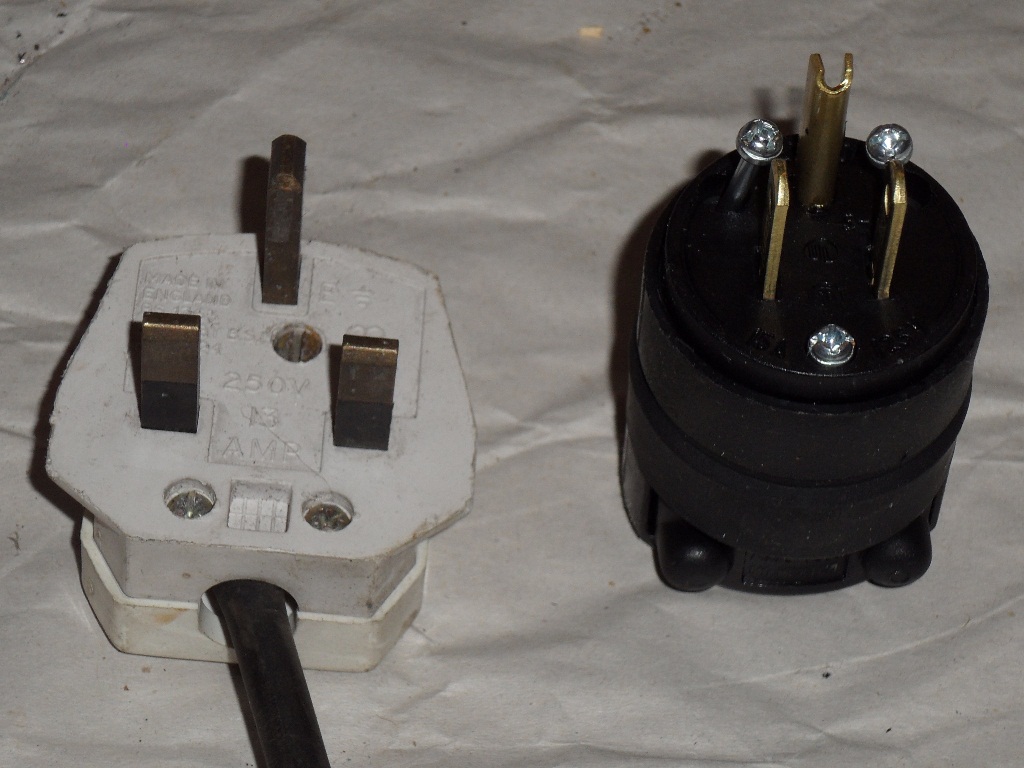
Some small nuts and bolts from the Home Depot were all that was needed to attach the mounting bracket back onto the power supply. Changing the UK plug to a US plug completed the wiring. Earth check was good. Ready for power on!
|
|
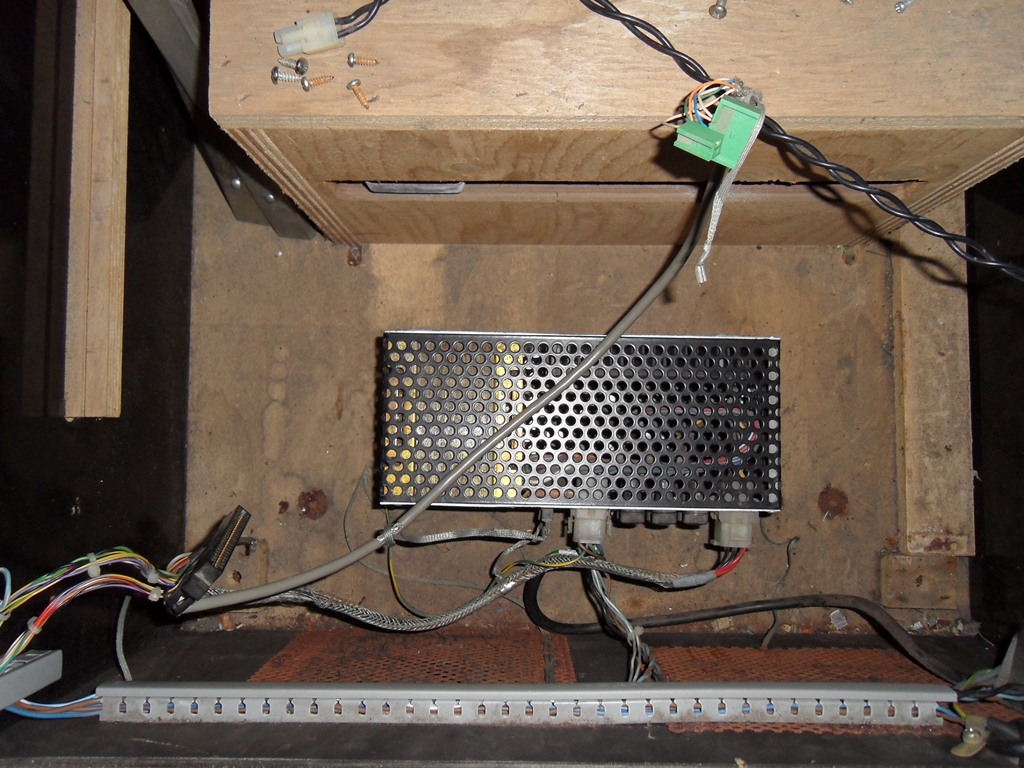
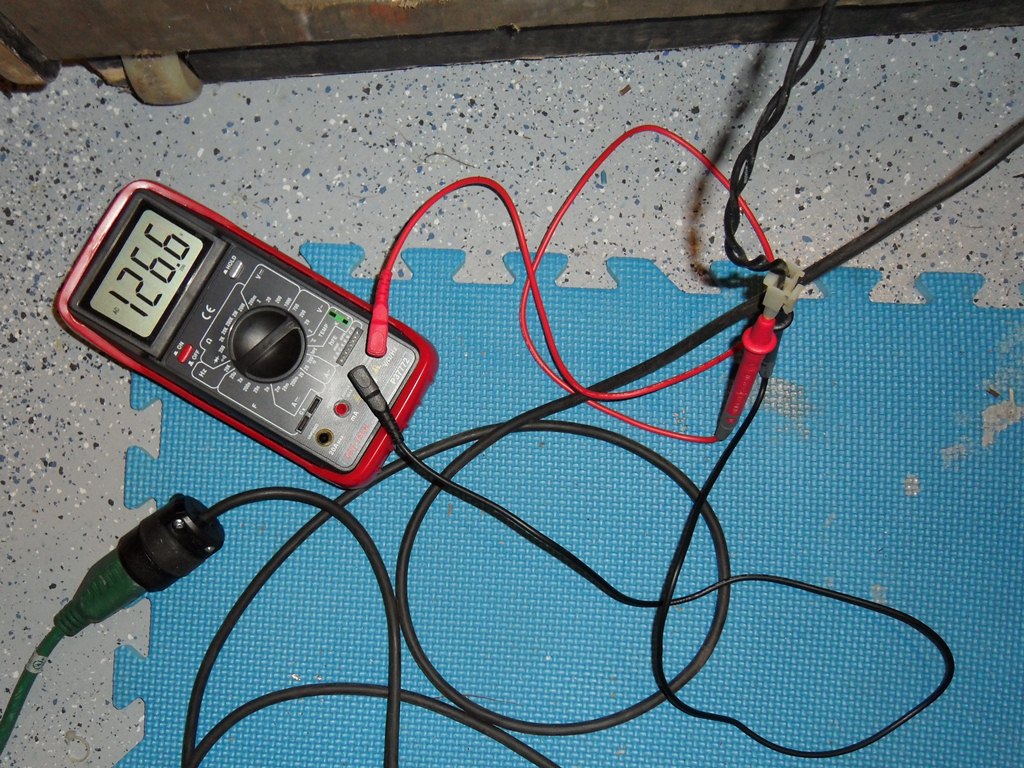
Reinstalled the power supply brick back into the cabinet for the first power on test of the whole power supply system. Monitor supply looks good - 126.6VAC is good for the Hantarex. Coin door lights are on. Marque light is working fine. Seems all the AC is looking good :)
|
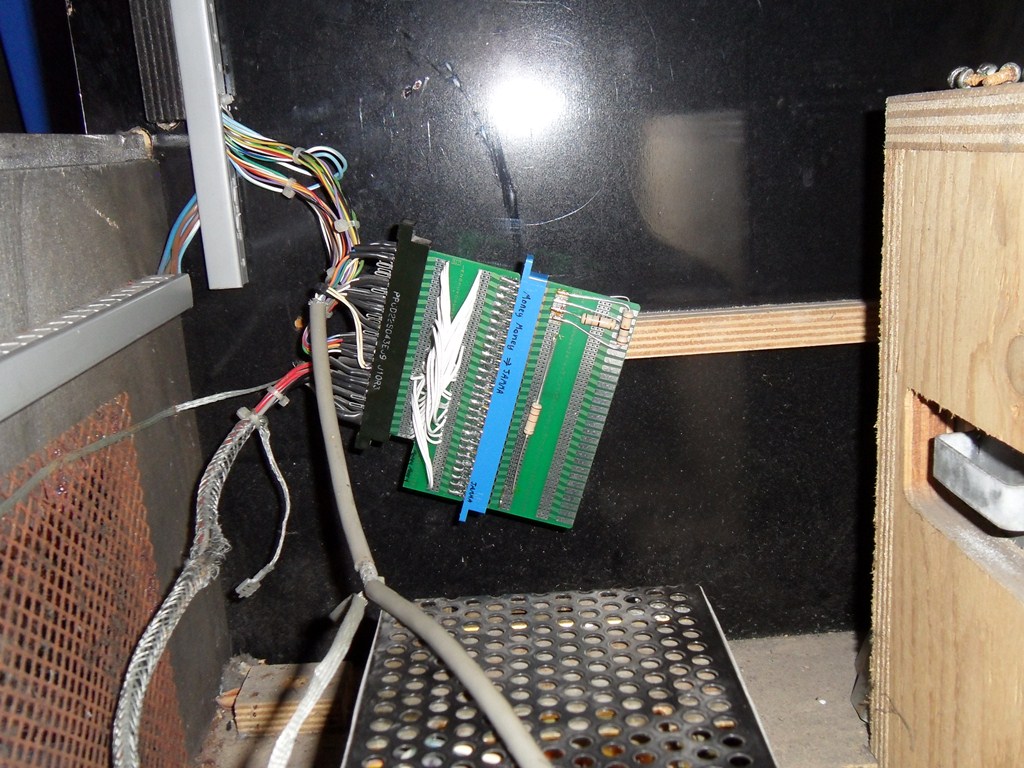
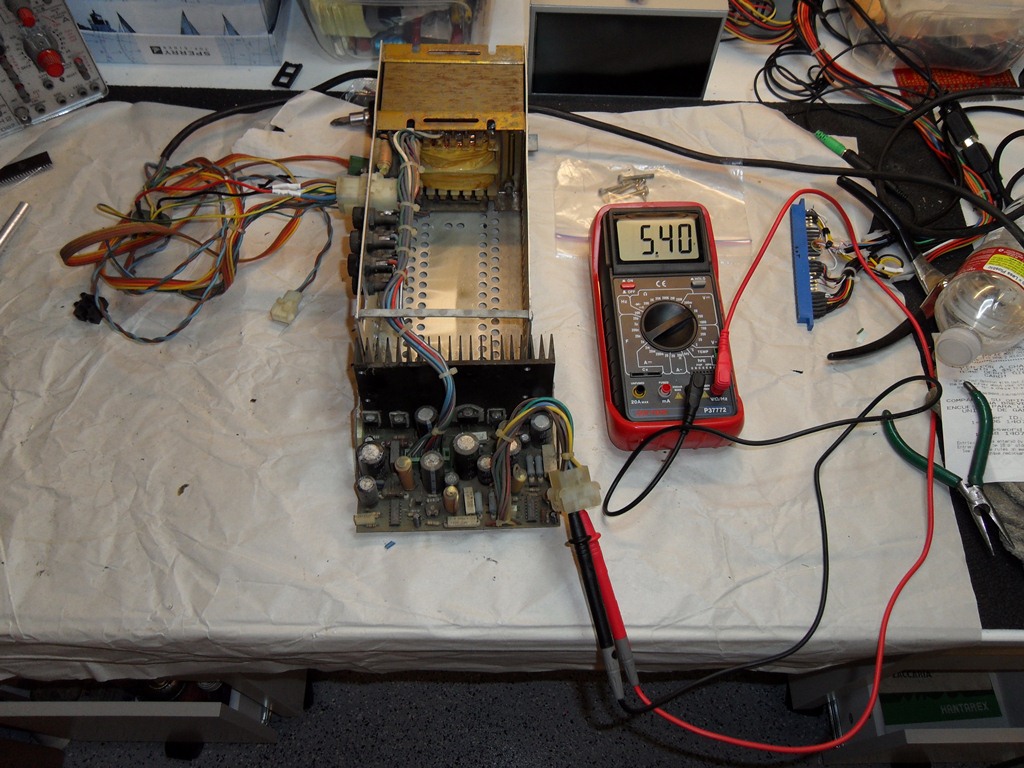
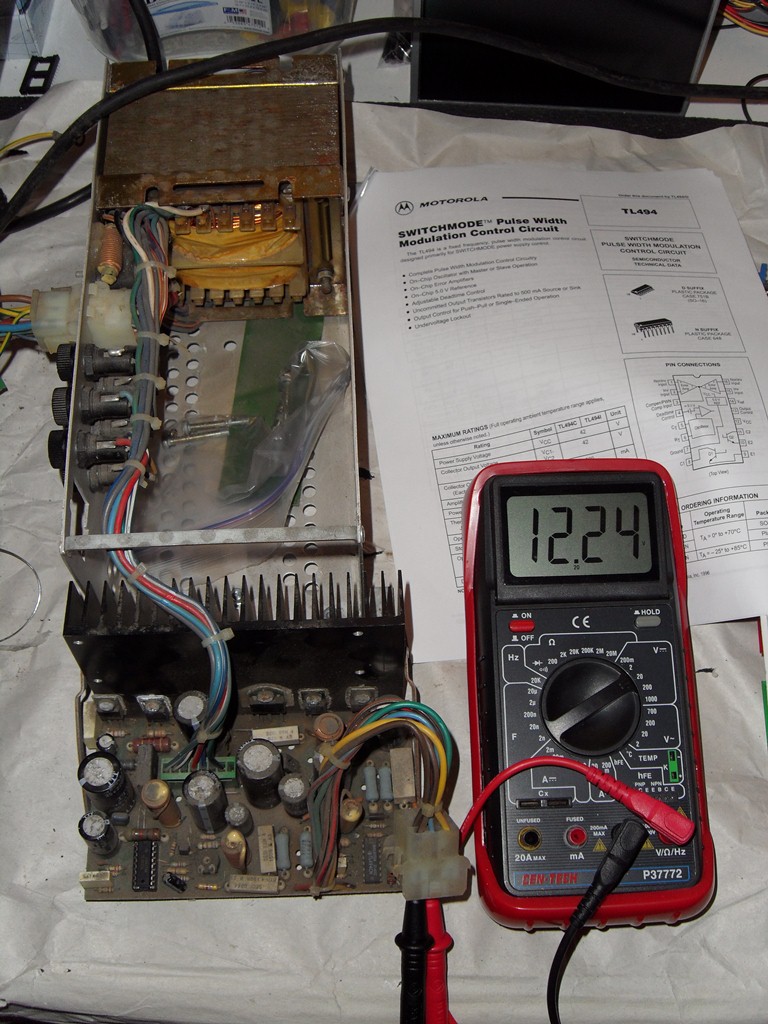
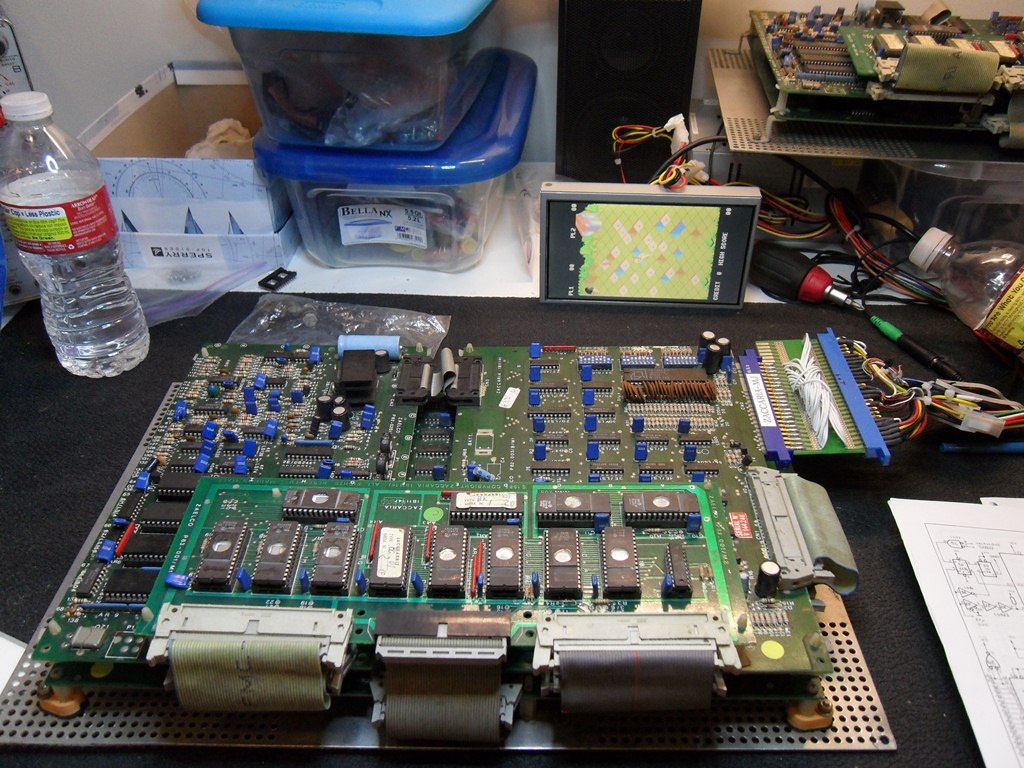
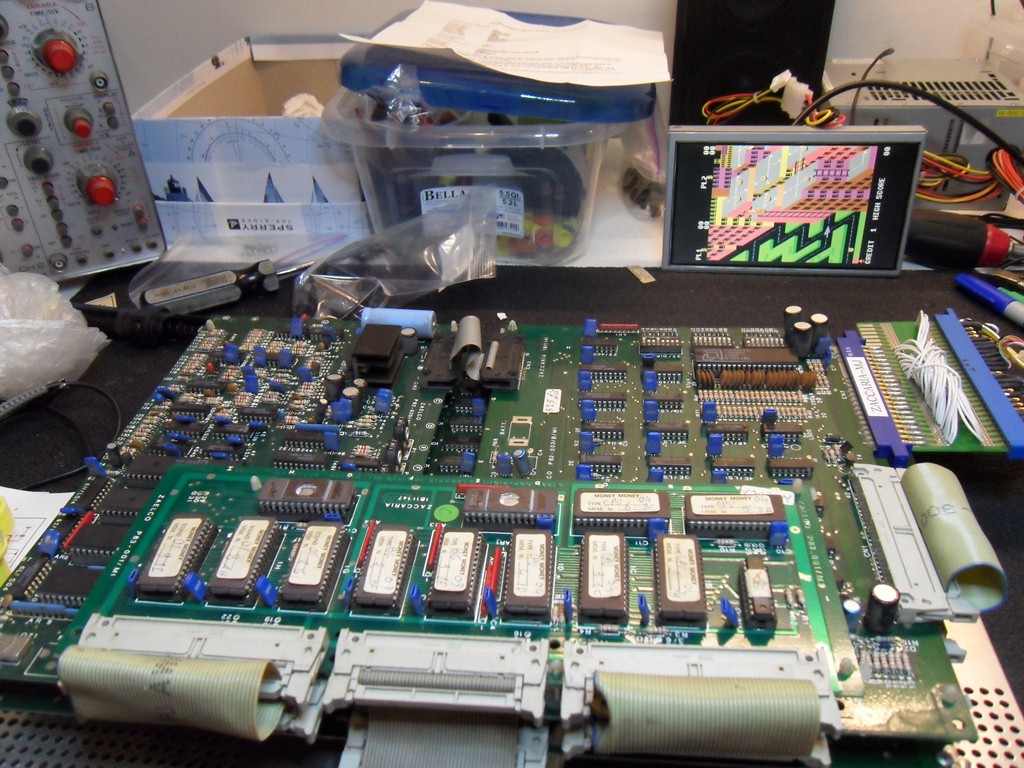
I had made a reverse JAMMA adaptor to be able to test other games in the Jackrabbit cabinet a while back when the Jackrabbit cabinet was the only complete working cabinet I had here in the US. Now I can reuse this along with my JAMMA dummy load adaptor to test the low voltage side of the power supply. +5.4V on the +5, -5V OK, -12V OK but the +12V was only 2.68V. On the bench with no load it measures 5.40V. Tried the other PCB from the EU power supply and (after fixing the dry inductor on the +5) got exactly the same behaviour - no +12V. The design is a low voltage switcher - now working on figuring out what's going on with it and for parts to arrive to fix it :(
|
|
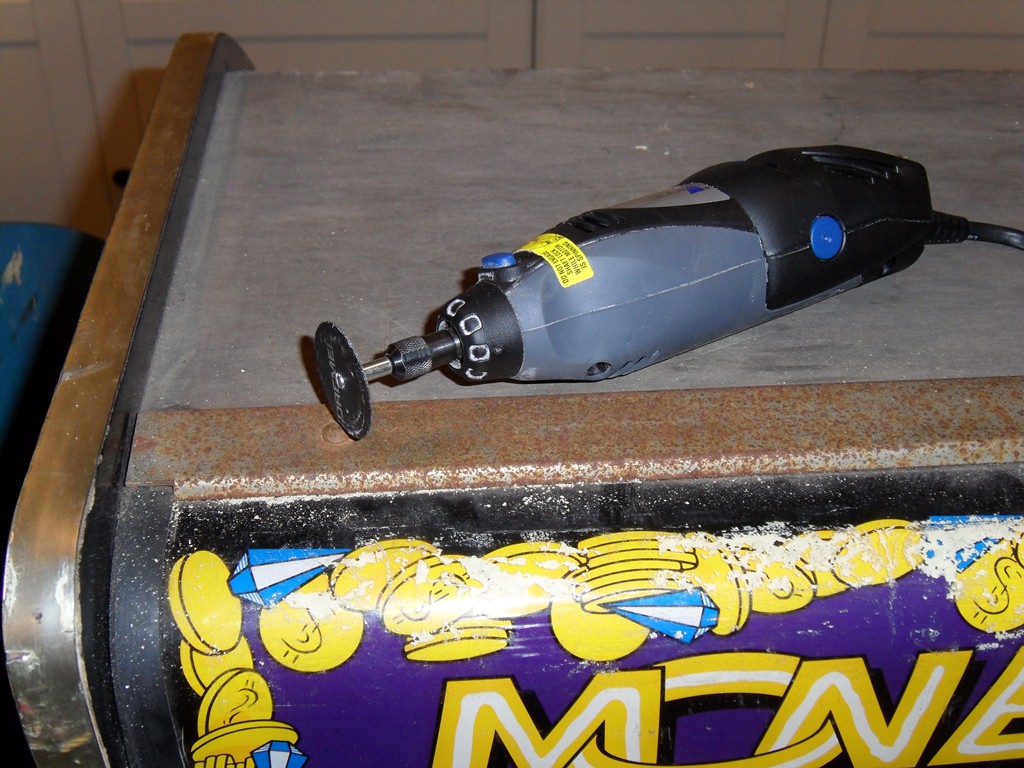
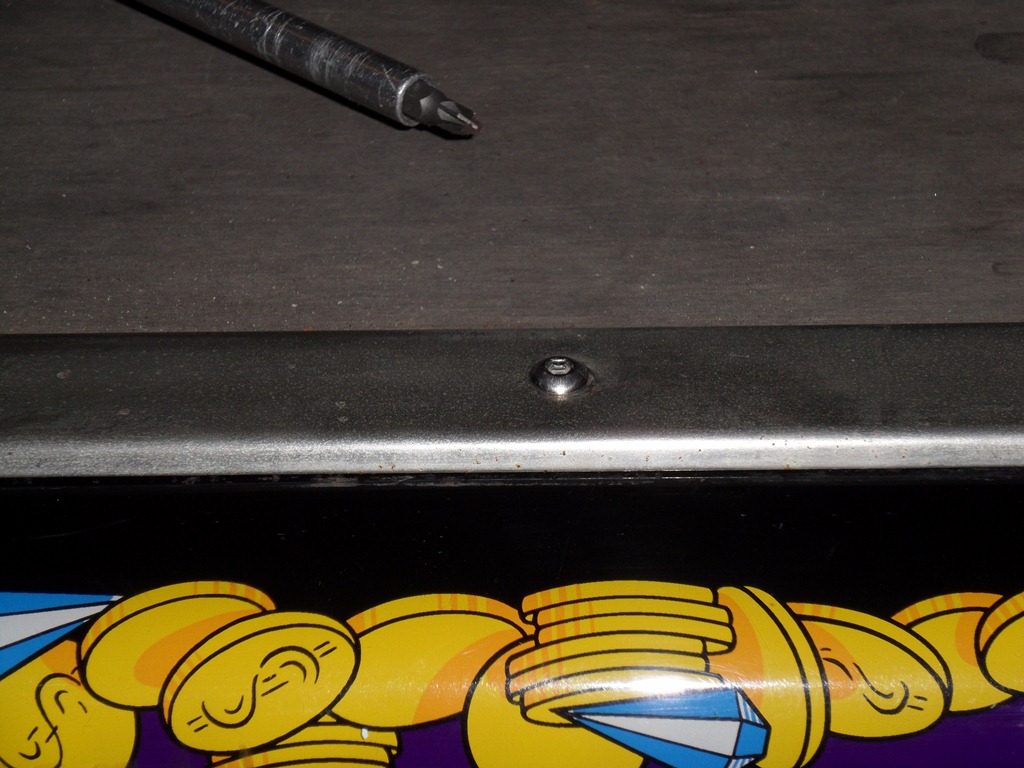
The plan to tackle the rusty marque carriage bolts was to use a Dremel with a cutting disc to cut a flat head screw groove into the head of the bolts so that thay can be unscrewed. This was enough to be able to get all but one of the rusted nuts undone except for the last one that got stuck fast almost at the end of the thread. Used the Dremel to cut the bolt off that.
|
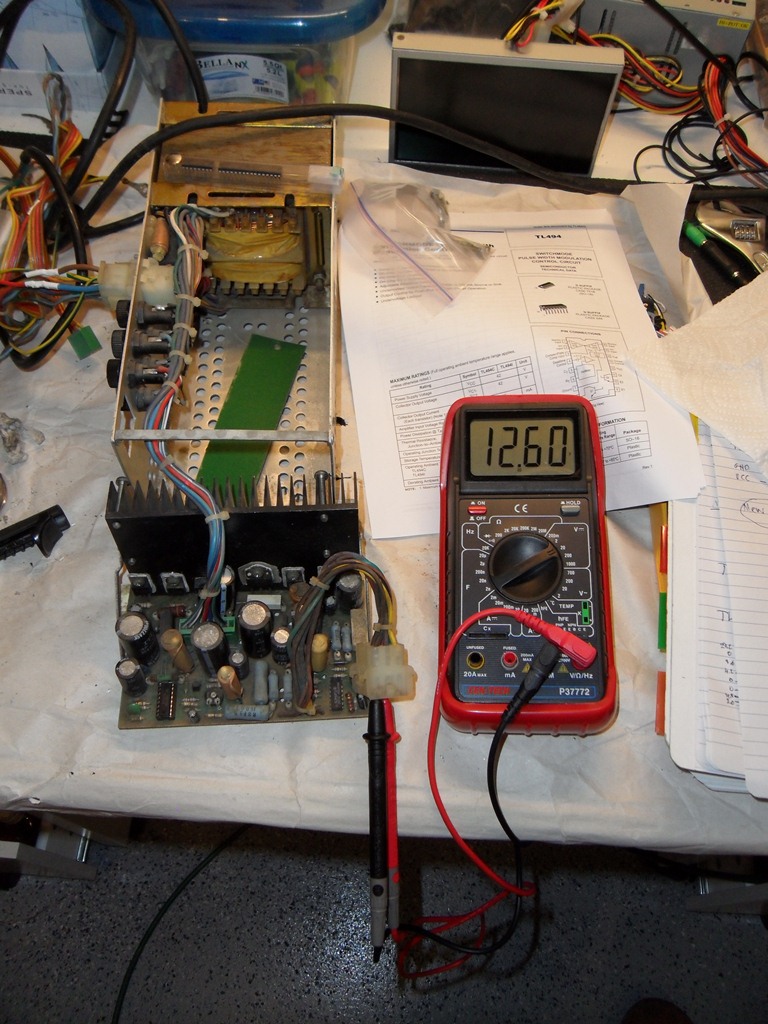
The new TL494 switching power supply IC's arrived and replacing it in the 12V circuit
of both the US and the EU boards fixed the +12V on both :)
For reference the silicon and capacitor parts list for the IGR power supply are below:-
| Silicon Parts List | Capacitor Parts List |
|---|---|
|
1 x TDB29125P 1 x TIP42B 1 x GI KBPC802 1 x TIP35B 1 x BYW80 1 x TDB29055P 2 x TL494CN |
2 x 10uF @ 50V 2 x 100uF @ 25V 1 x 470uF @ 25V 1 x 470uF @ 35V 1 x 1000uF @ 16V 1 x 1000uF @ 35V 2 x 2200uF @ 25V 1 x 2200uF @ 35V 1 x 3300uF @ 16V 1 x 3300uF @ 25V |


|
Found these stainless steel round head hex bolts to use as replacements for the original rusty carriage bolts that were cut off. Installed the US marque with all new bolts. Looks OK to me. The marque light is also now installed.

|
First complete power on! The monitor appears to be working OK but the game PCB didn't boot. It didn't boot on the bench either :(
|
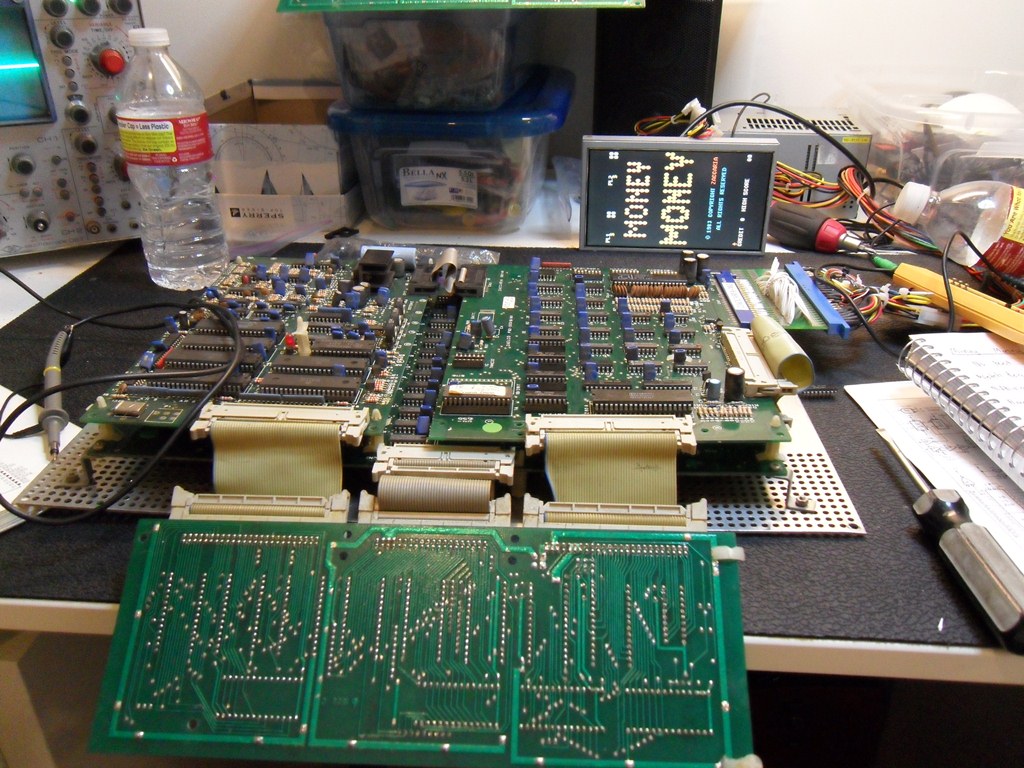
Poking around with the scope didn't turn up anything obvious so moved on to start out with a working spare Jackrabbit PCB and began by replacing the 4 x 2114 RAM with the ones from the faulty Money Money. Jackrabbit stopped booting and working through the RAM one at a time found the bad one. Moved back over to the Money Money with the now known good working set of 2114 - still no boot. No signs of life from the Z80 CPU so swapped that over. Jackrabbit now dead but Money Money booting! Z80 confirmed bad. Not quite done yet, though...

|
|
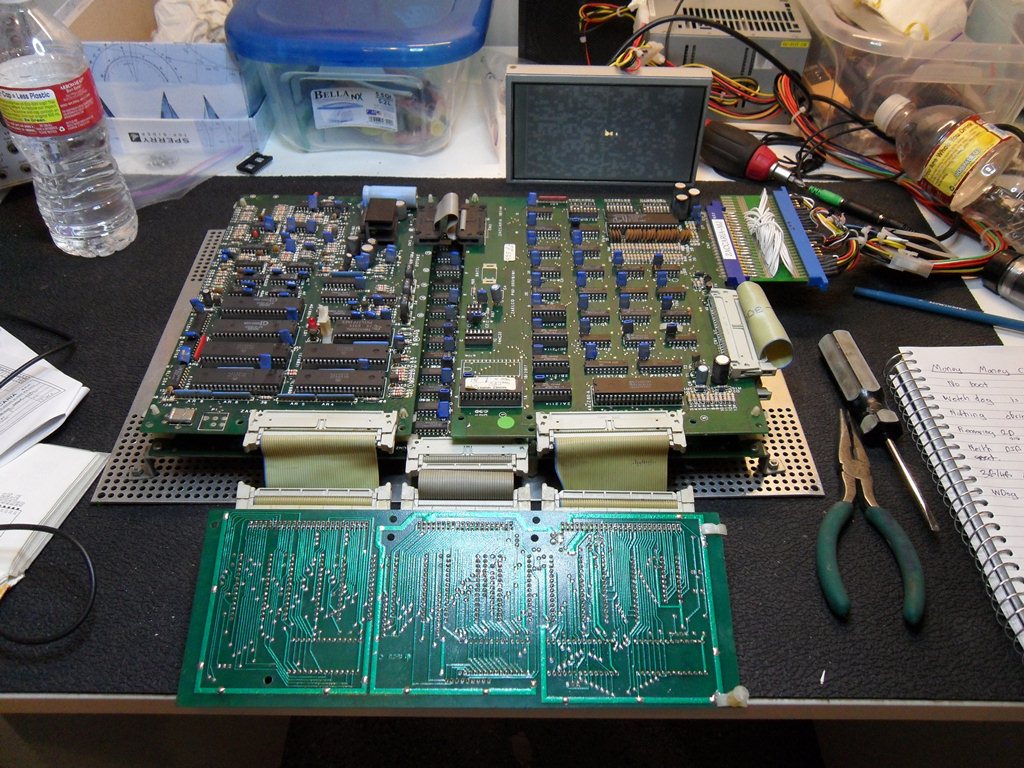
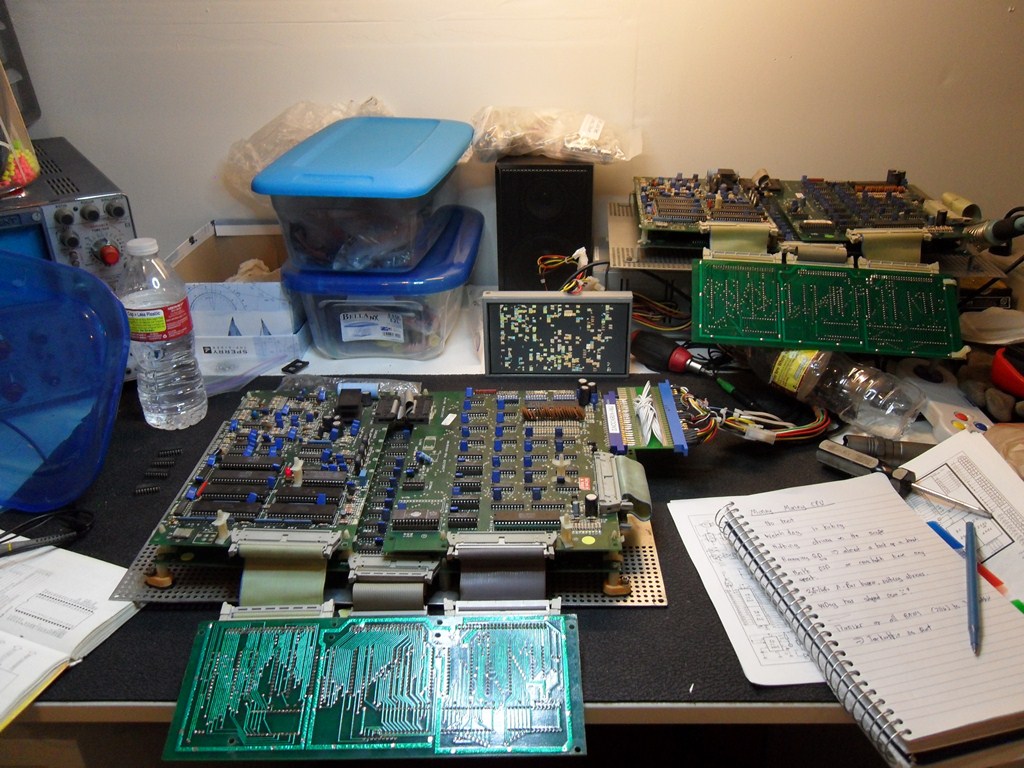
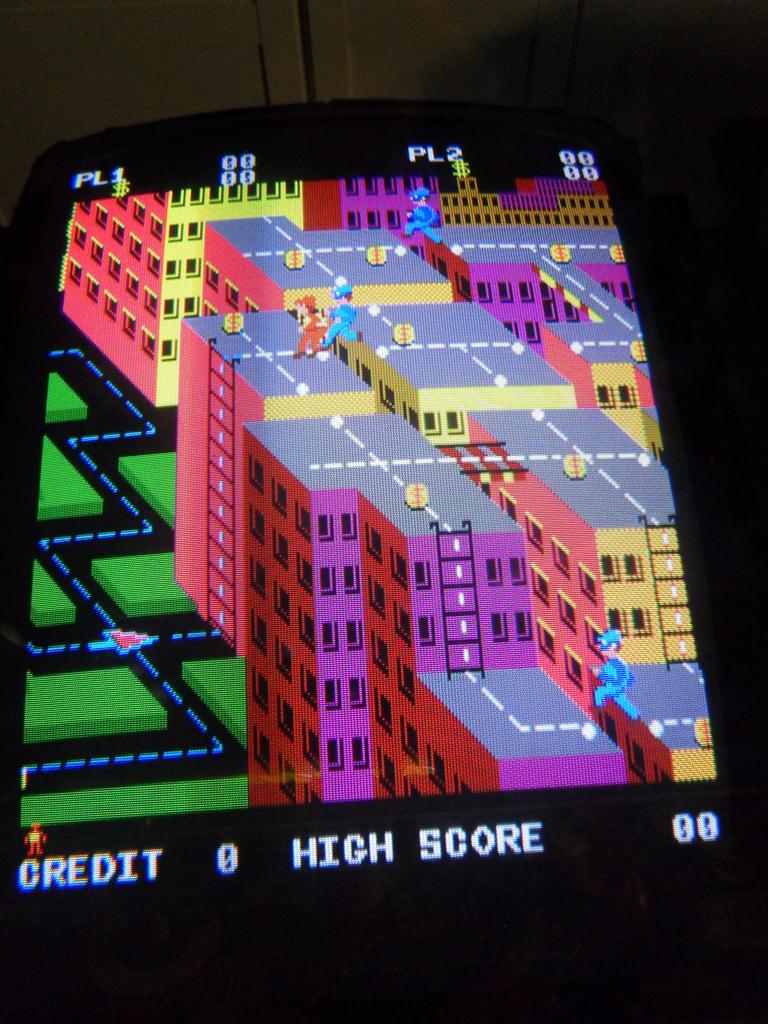
Initially the game seemed to work OK but after a few seconds the graphics became more and more corrupt. All the 2114 on the video board on the bottom are socketed so I started replacing them one by one. In a stroke of good luck the first one I replaced fixed the issue To confirm the RAM was in fact bad I tried it on the CPU board and the game wouldn't start. Confirmed bad. In total, 2 x 2114 and 1 x Z80 CPU were bad.
|
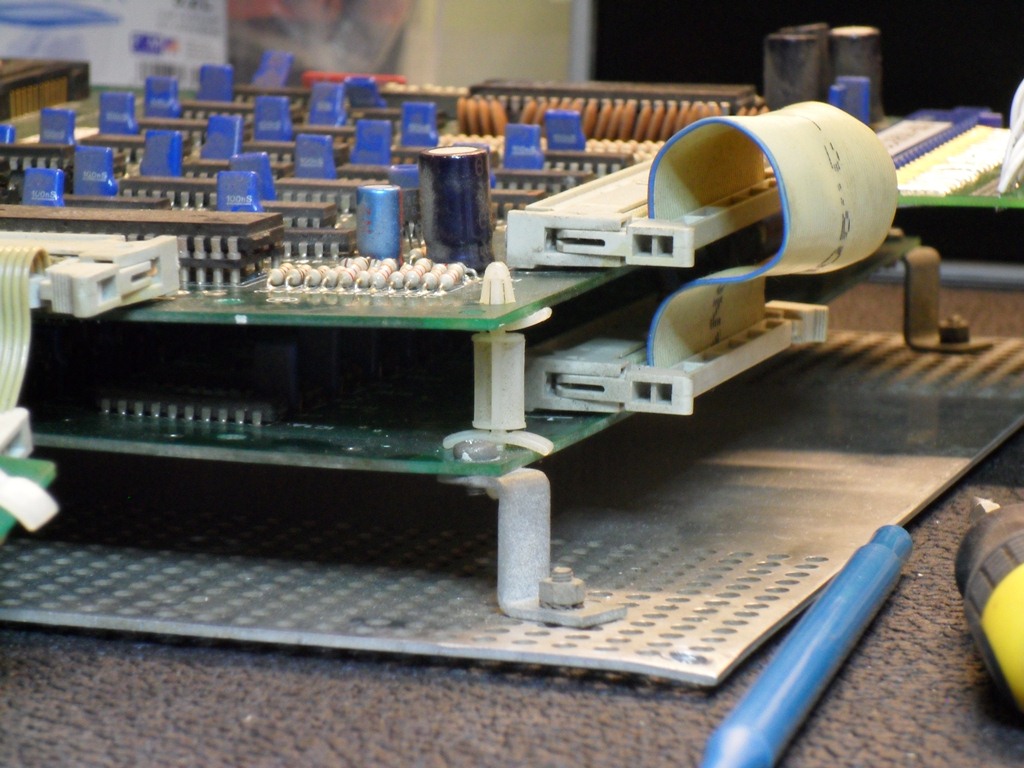
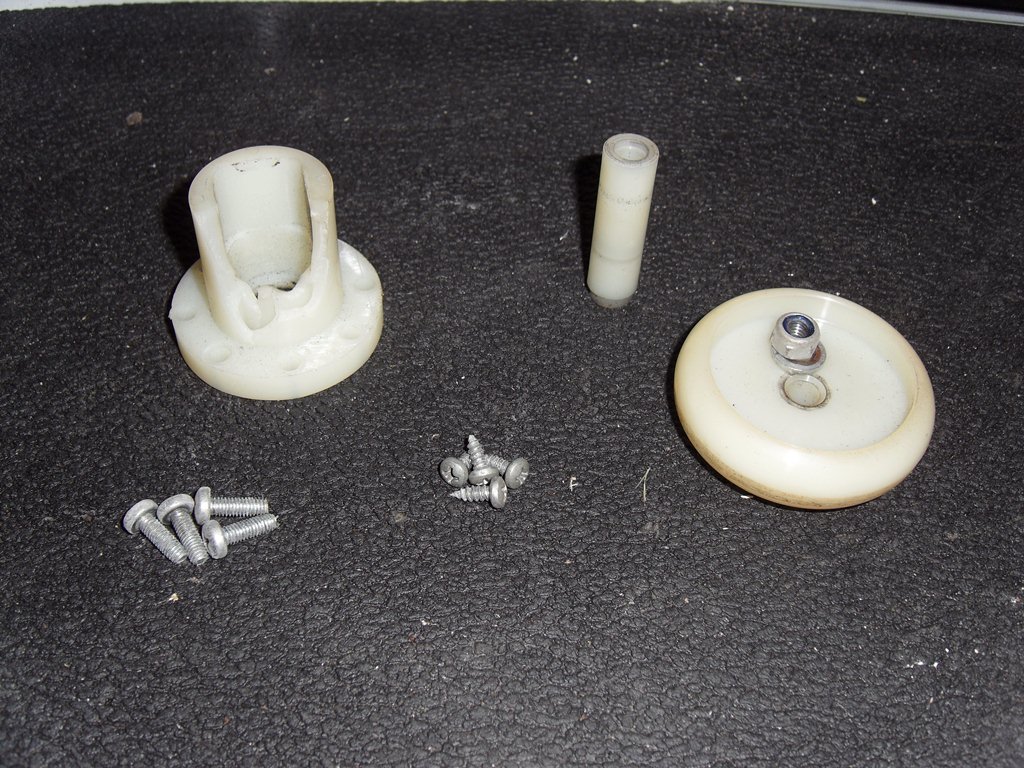
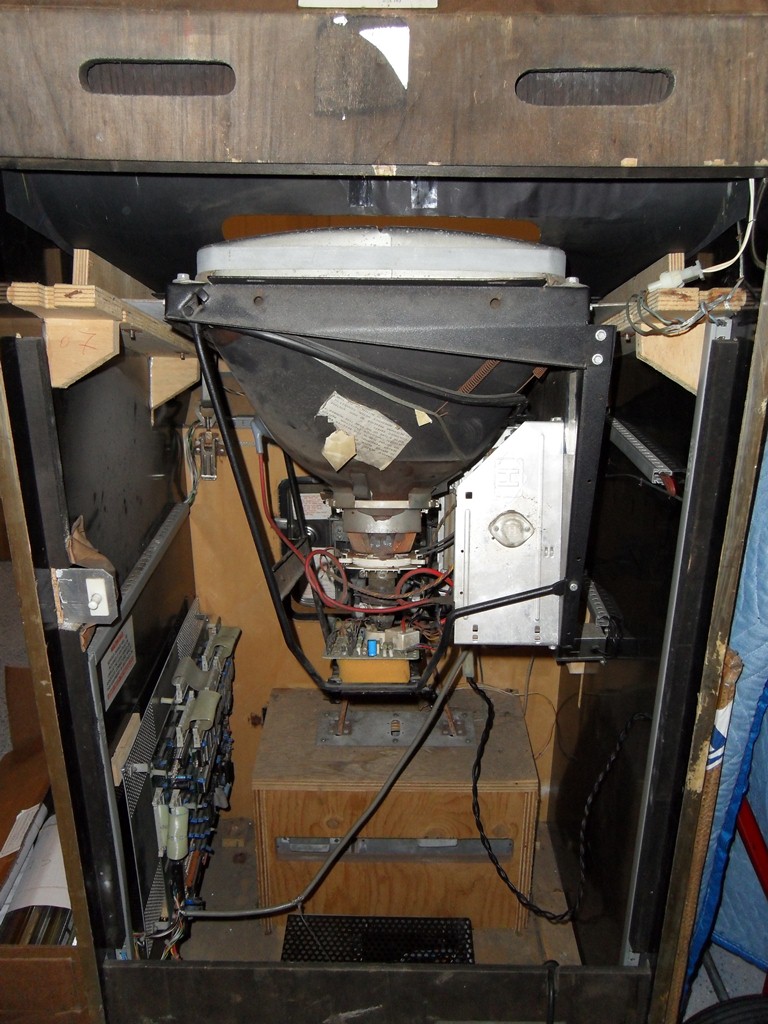
When the US Money Money was dropped it snapped quite a few of the PCB stand offs like the ones pictured. For now, I'll borrow some off the spare Jackrabbit but I need to find a supplier for these.
|
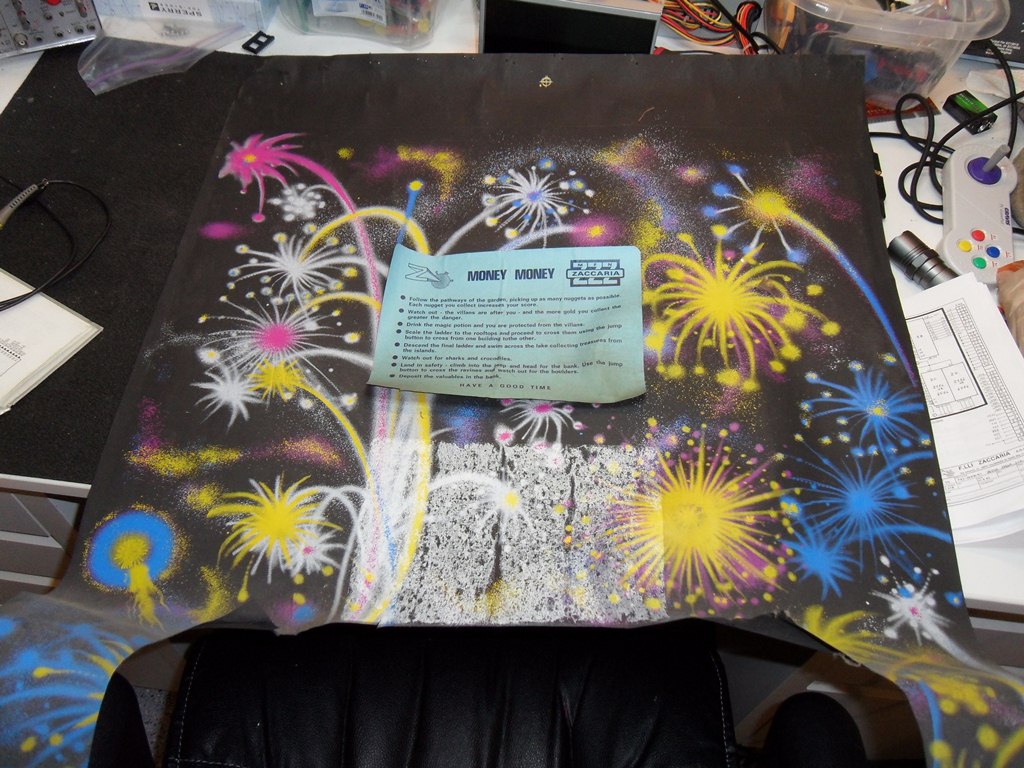
Peeled of the instruction sheet from the hacked EU monitor surround and scanned it in for future use here (300DPI 10Mb).

|
The game PCB installed back in the cabinet for a whole game test. The controls were a bit unresponsive - something to look at later.


|
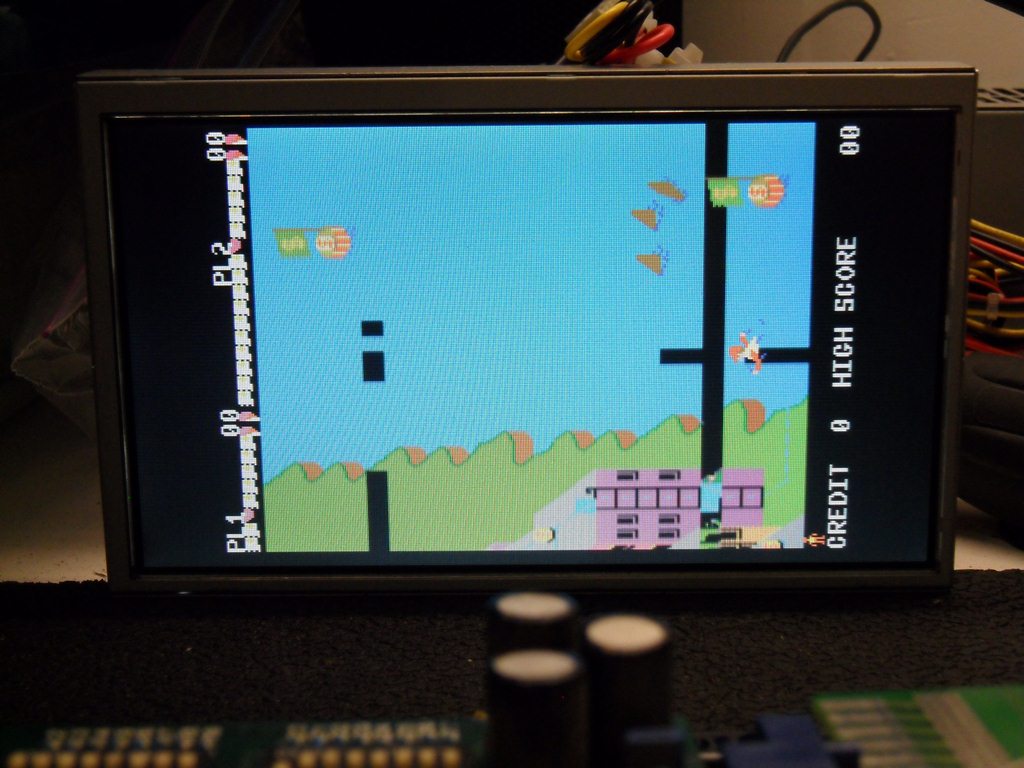
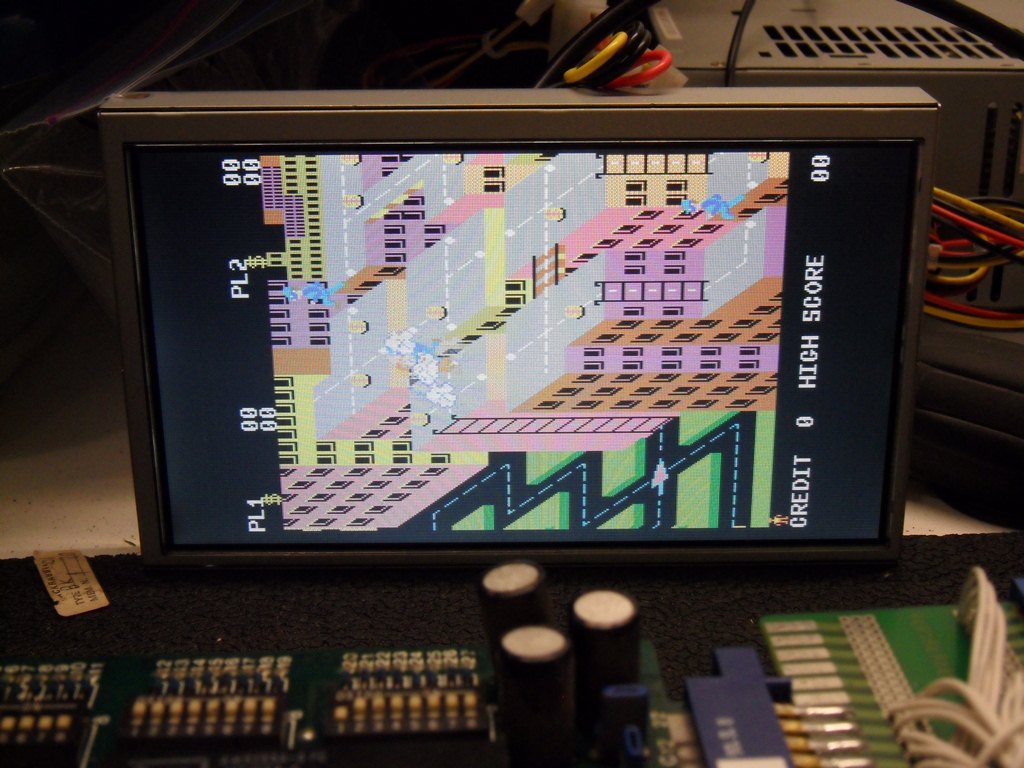
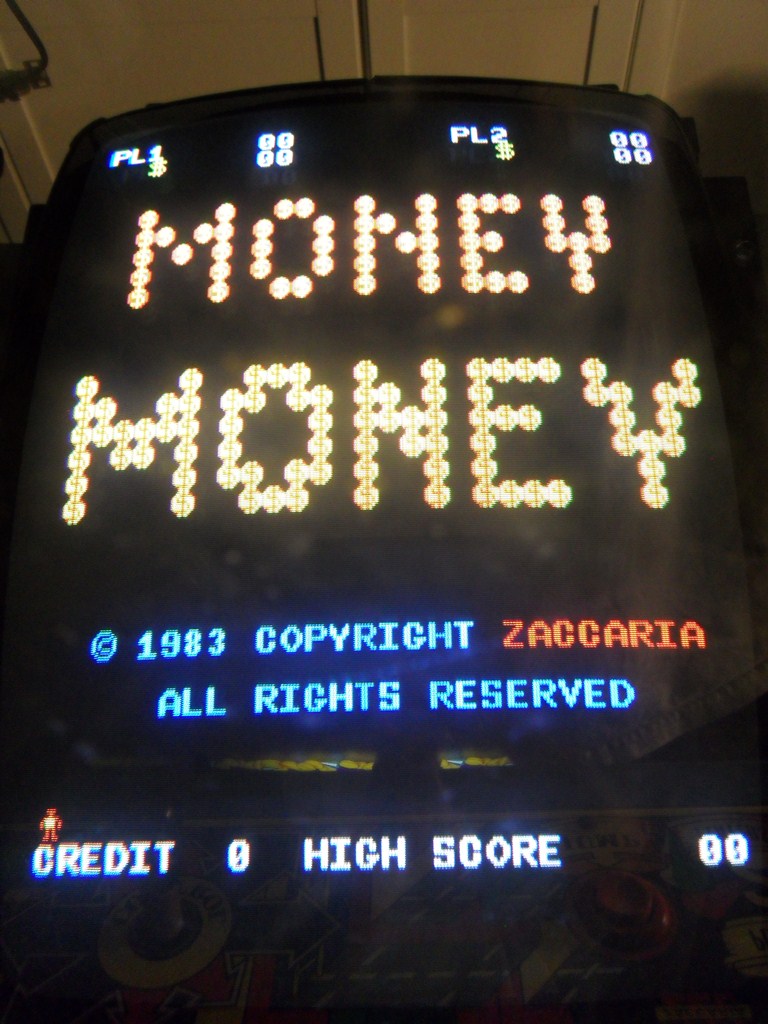
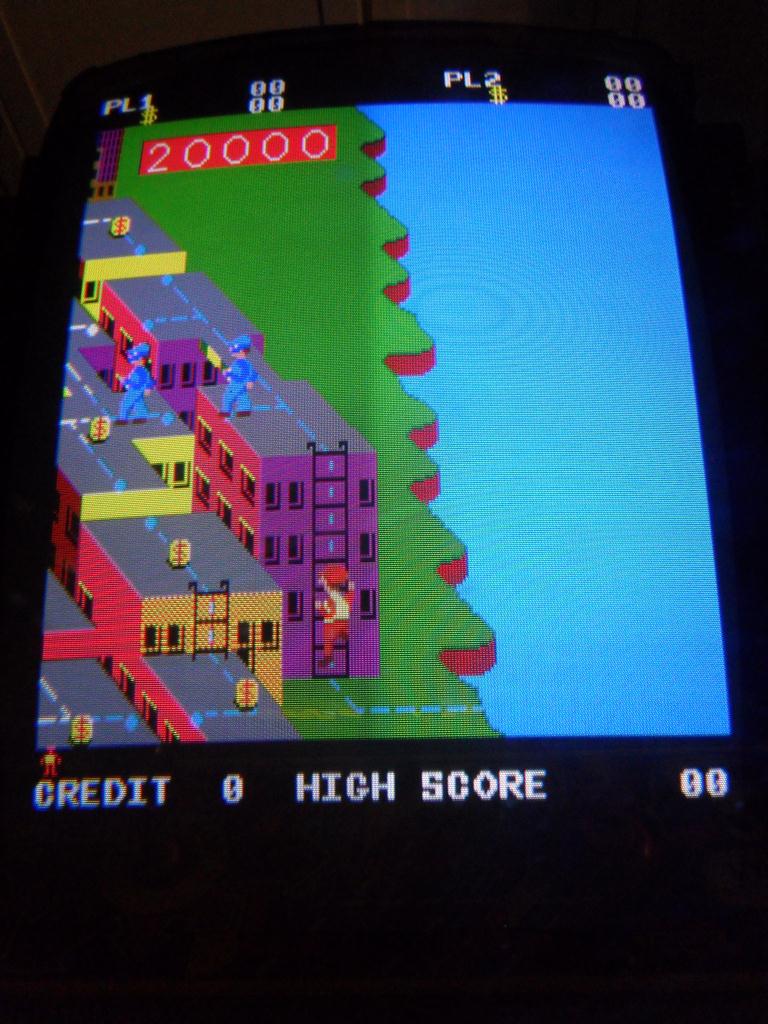
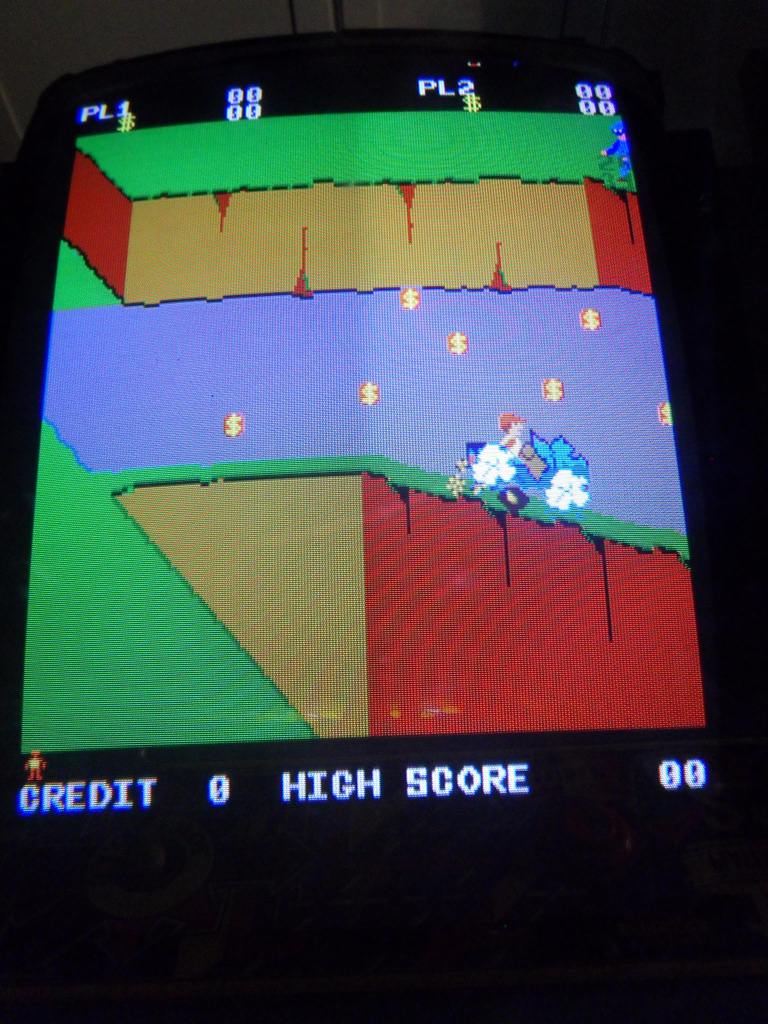
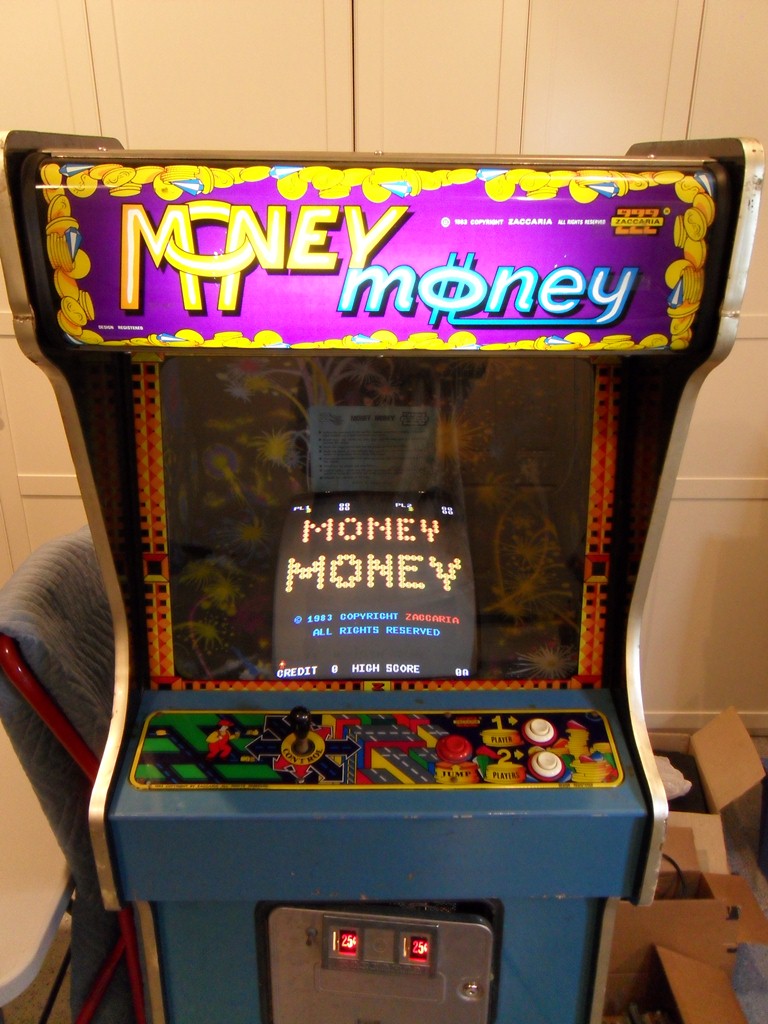
The title screen looks OK - good brightness, all colours & sharp focus. On the full screen levels though the picture dims unevenly with streaking and slight fold over on the right. Needs a cap kit I think :(
|
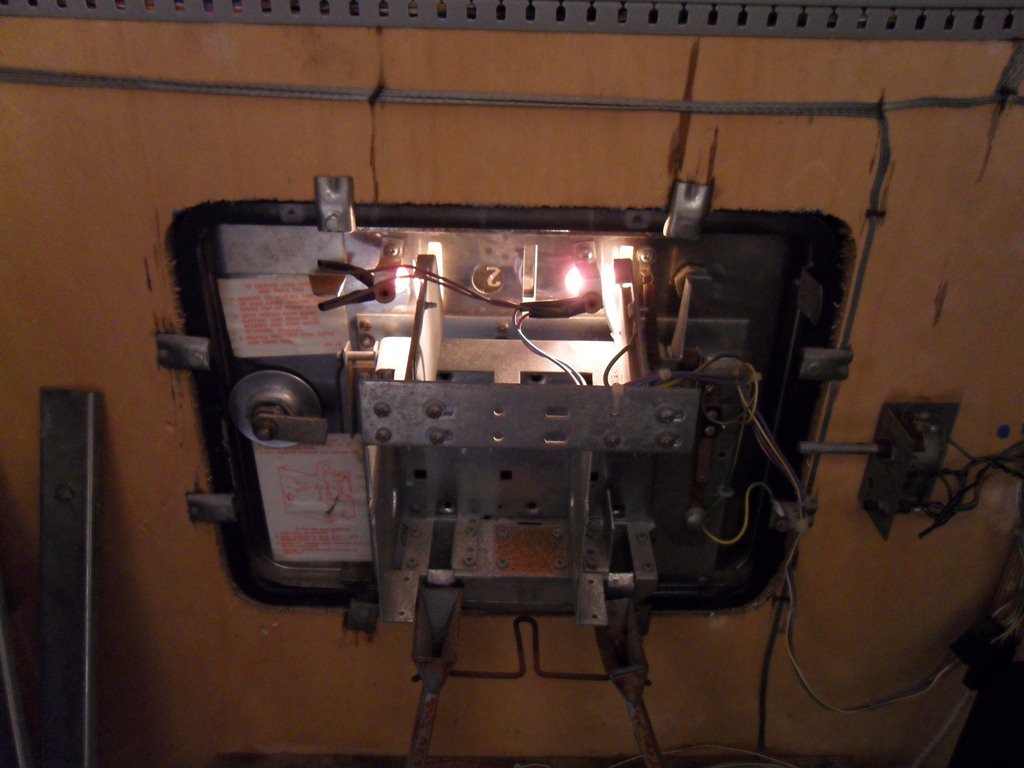
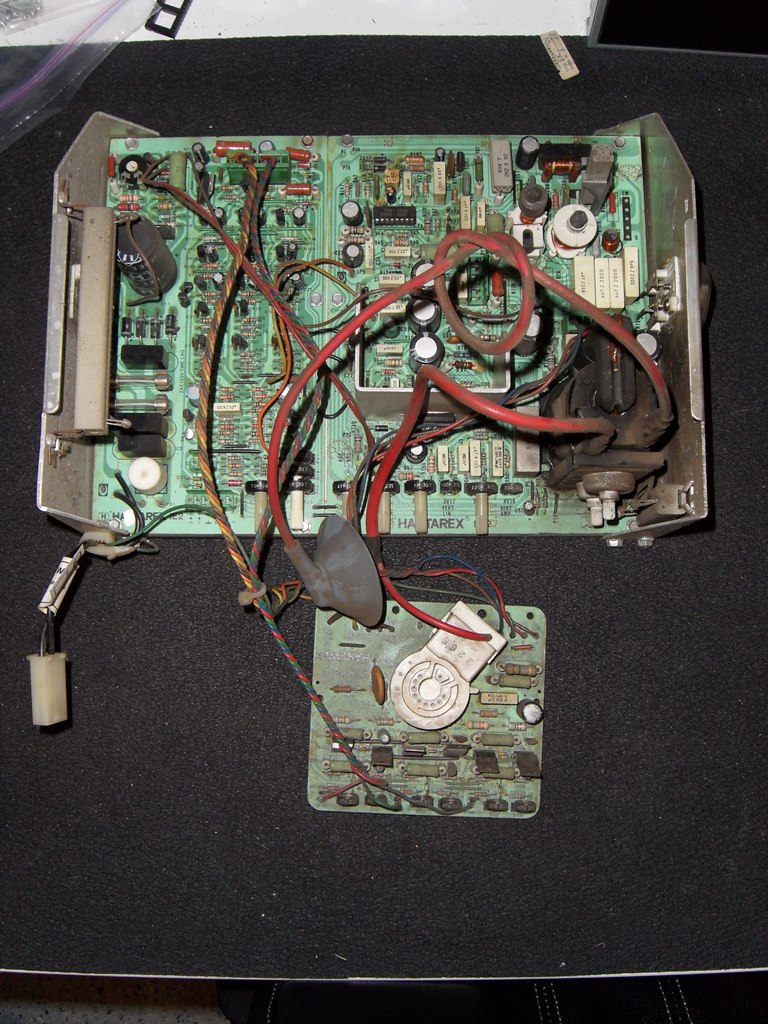
Pulled out the Hantarex chassis and fitted a cap kit. On retest the game started with a good picture and then crashed out with wavy lines and bad speaker hum. Touched an IC on the game board and it was burning hot. Measured the +5V power supply at 7.75V. This was a Very Bad Thing :(


|
|
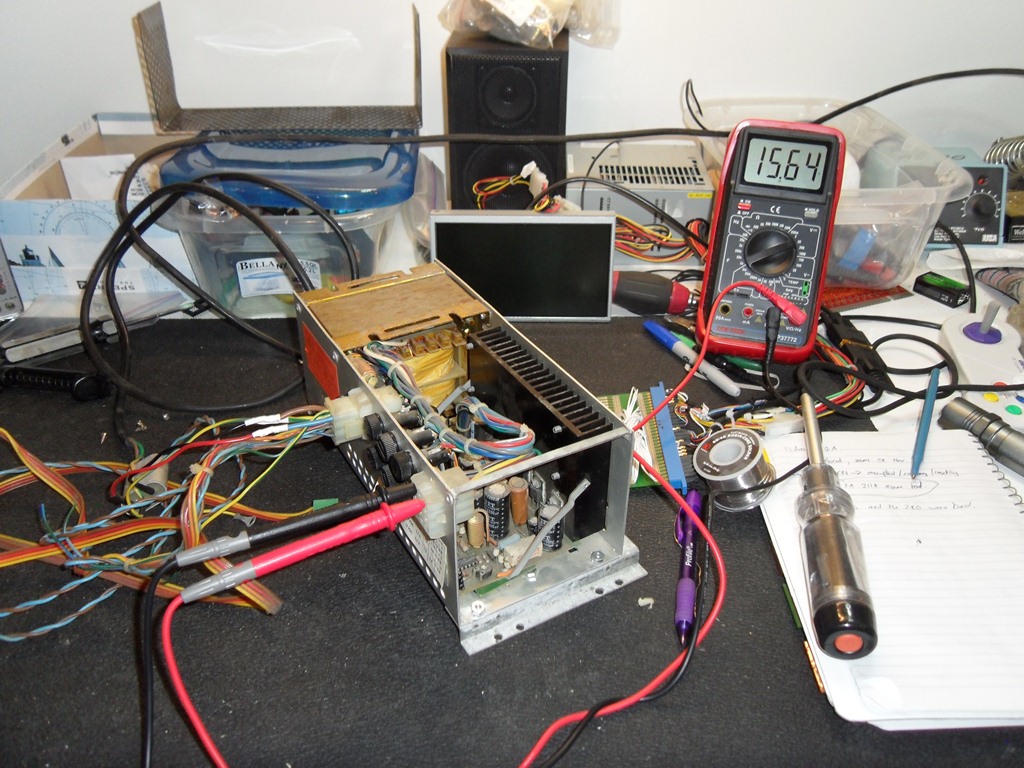
With a dummy load in the cab the 5V reads 9.77V :( The !@^$!@* thing burned the dummy load, even. Tested the game PCB back on the bench looks like it's survived for now. Back on the bench the IGR power supply output 15.64V with no load on the +5V line :(
|
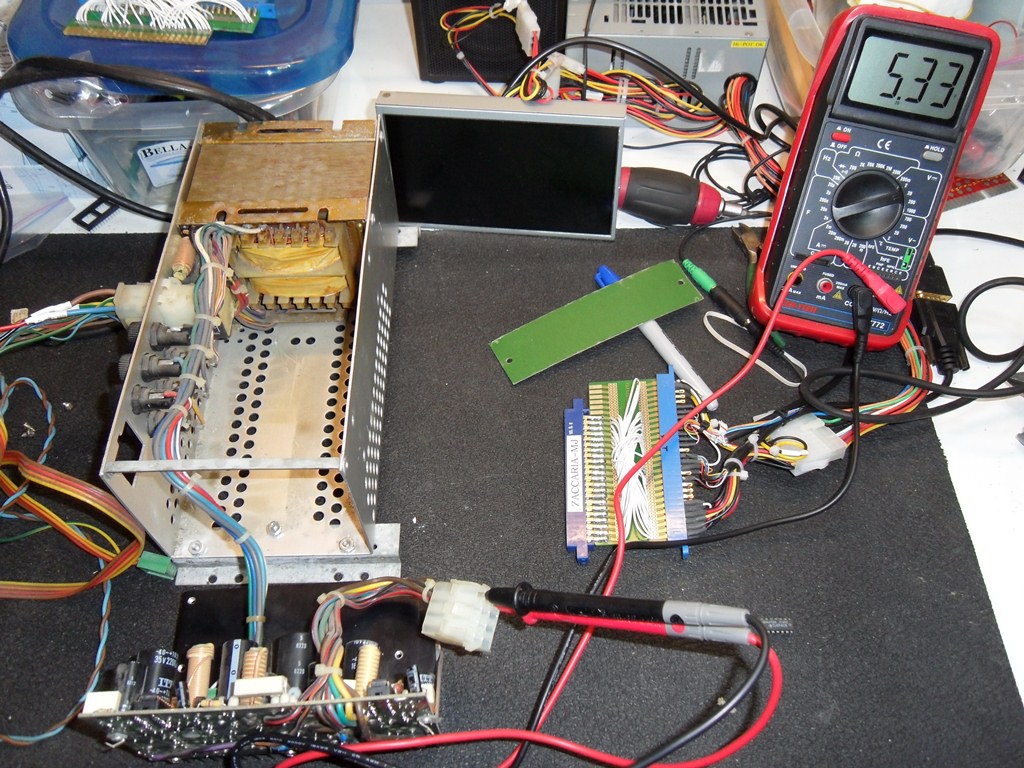
Another faulty TL494 replaced and the +5V is back to being +5V again. I'm investigating an outboard inline crowbar widget to go in between the IGR and the game PCB to protect the game PCB. Someone suggested the Stargate widget (later incorporated into the Joust and later power supply) as an option. A reproduction could be a future project if I can find one to strip and scan the PCB.
|
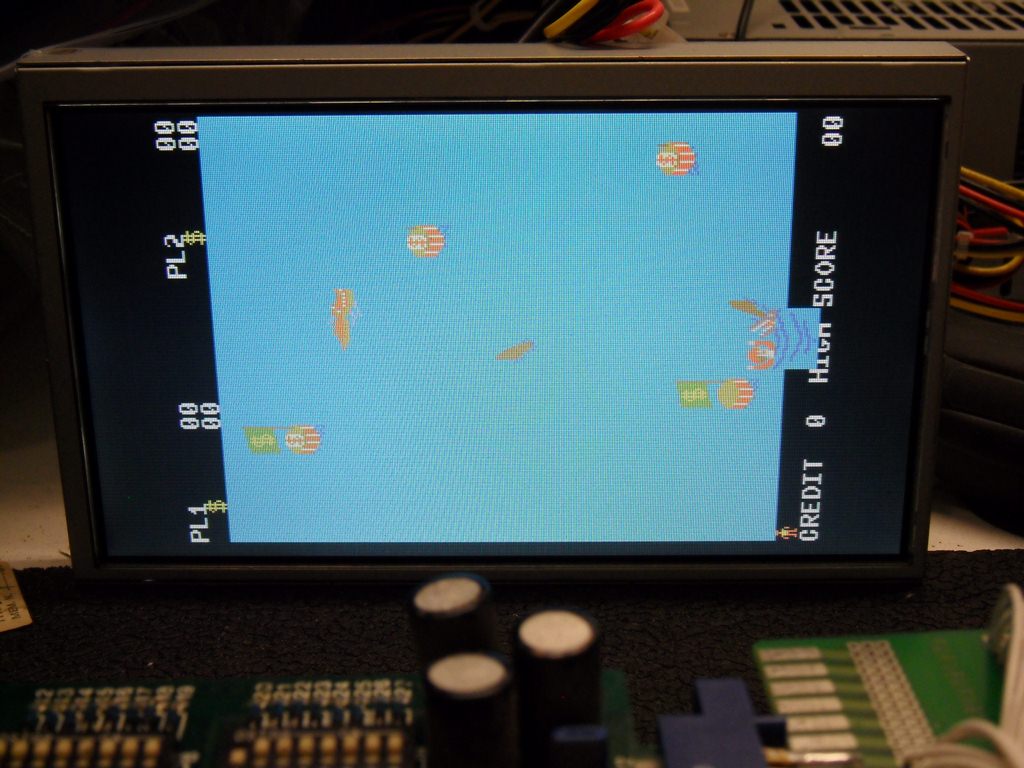
After the cap kit all the streaking is gone and the picture looks fine :)

|
Carefully peeled off the Jackrabbit instruction sheet and then used a damp paper towel to remove the surface dirt from both sides. Sandwiched it between clean paper under foam tiles and wood paperweights for a few days to flatten it out.
|

|
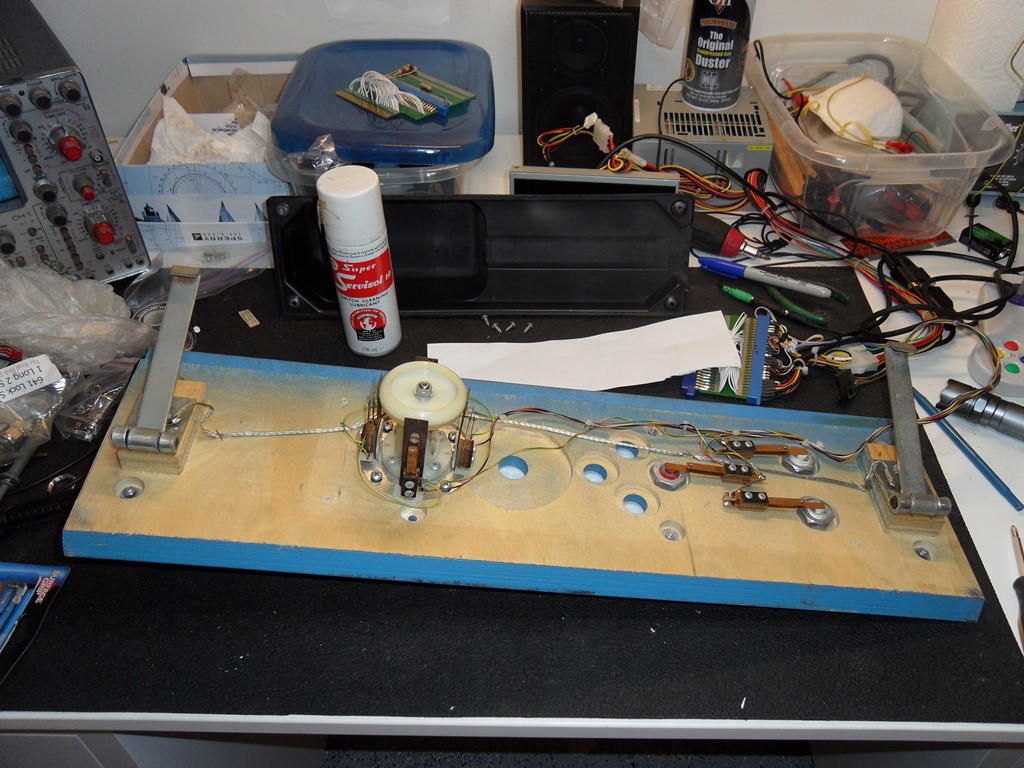
To try to correct the poor response in the game, I removed the control panel and the back cover to clean the leaf switches. The joystick on this control panel is broken on the right :( The cleaning method for the leaf switches is to pull a strip of paper soaked in switch cleaning lubricant through the closed switch contacts. On retest the respose was still poor :( Next step is to try the EU control panel to determine if it really is a joystick issue or a game PCB issue.

|
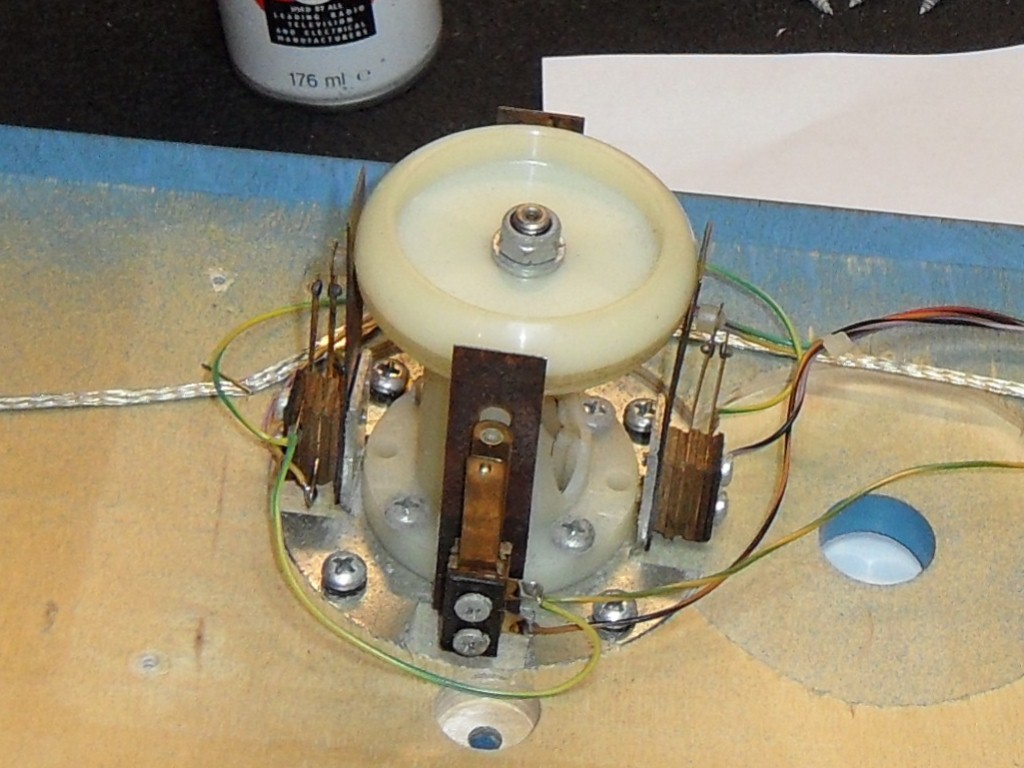
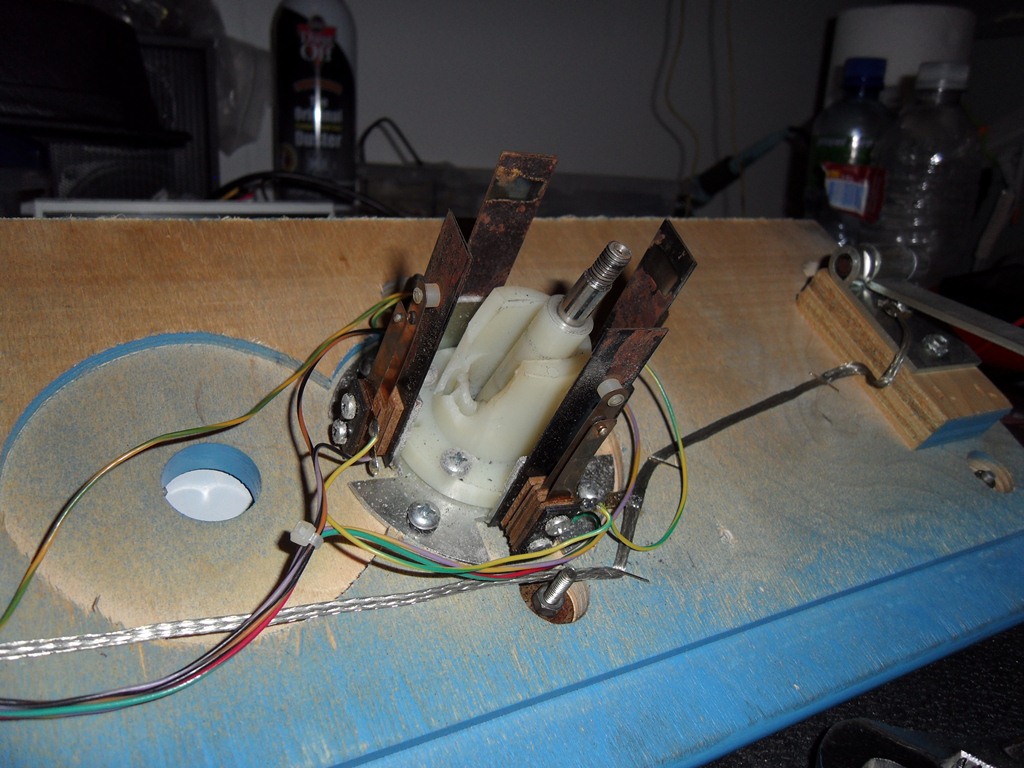
Tried the EU control panel and the game played much better. However, opening up the EU control panel revealed that it had a different joystick part than the US joystick. The Jackrabbit upgrade for Money Money manual(4.6Mb ZIP) tells all - the square insert is used for Jackrabbit to give diagonal favoured control. The round insert is used for Money Money for a normal directional control. The US control panel must have been Jackrabbit at one point and thus has the wrong joystick part. Changed over to the correct part for Money Money and there is joy in the stick :)
|
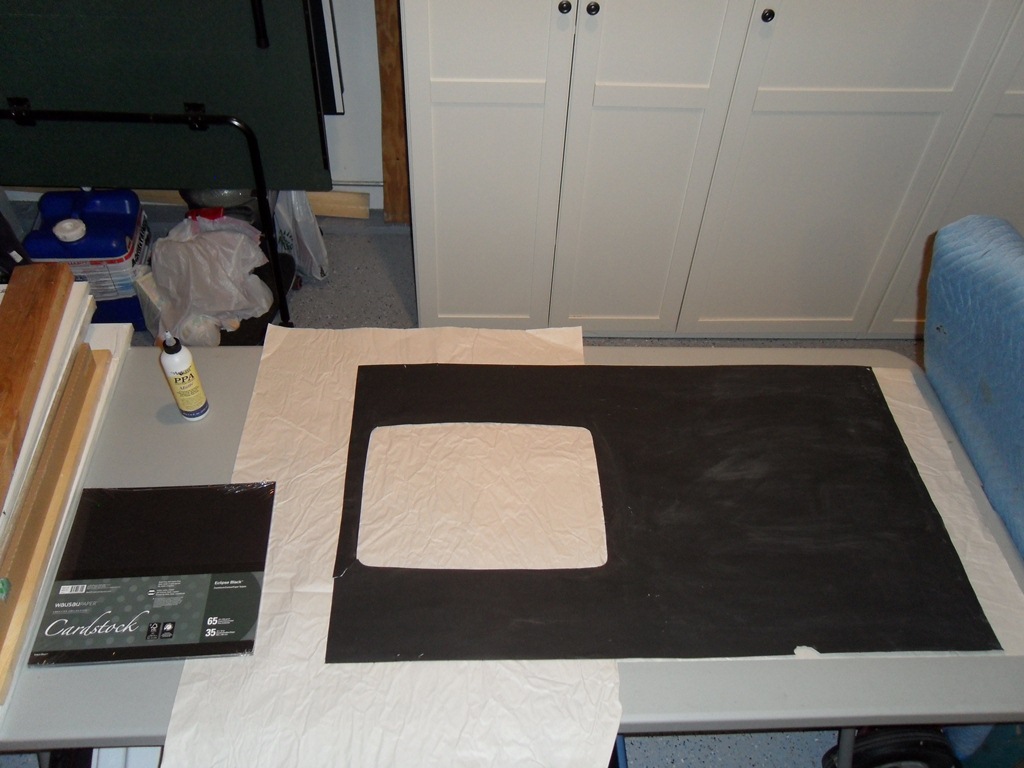
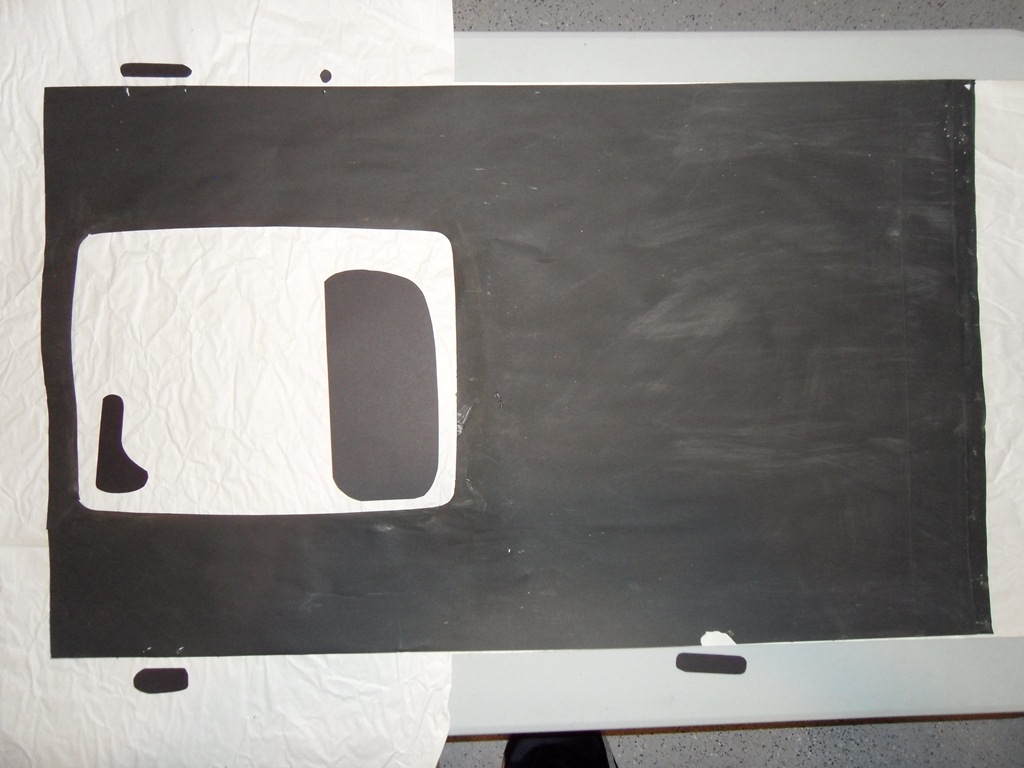
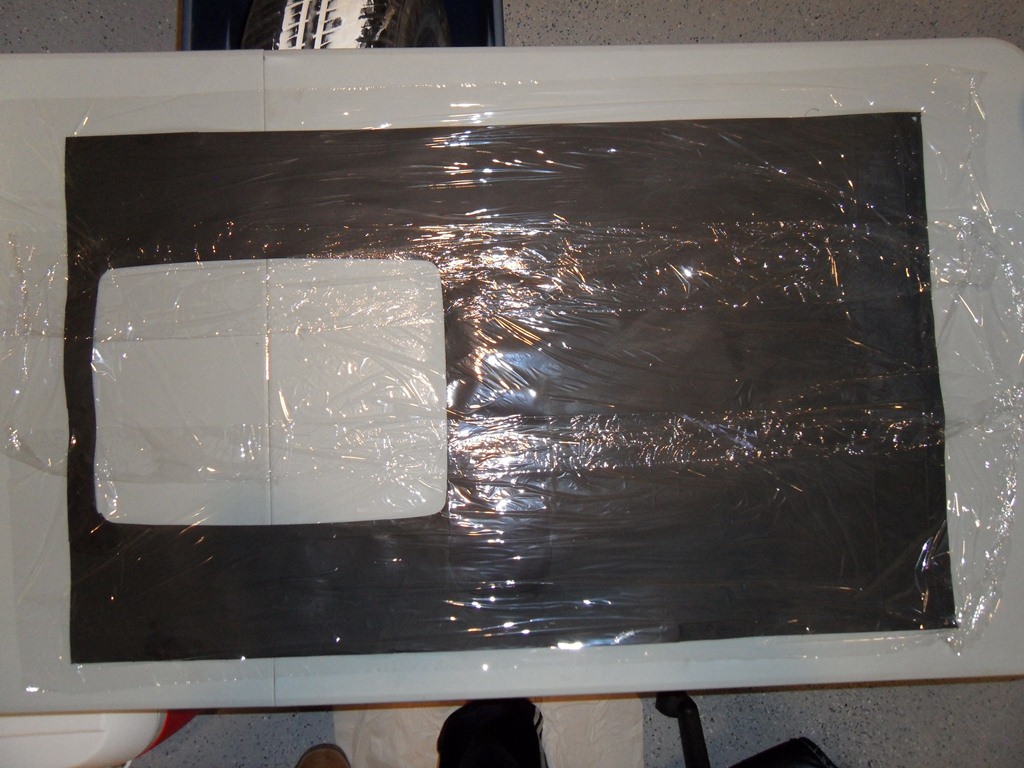
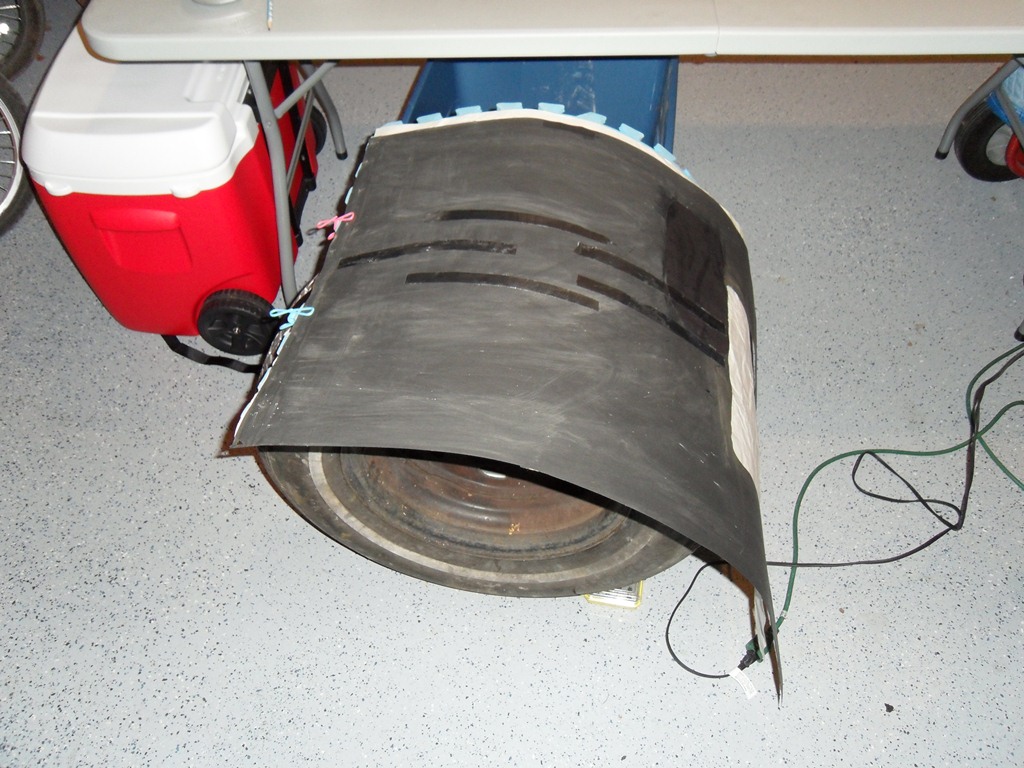
The US surround was torn and damaged when monitor assembly collapsed so before curving and ribbing it needed to be patched in a few places with black card stock and some UV/archival quality paper glue. The cling film protected against the glue sticking against the press on top whilst it dried.

|
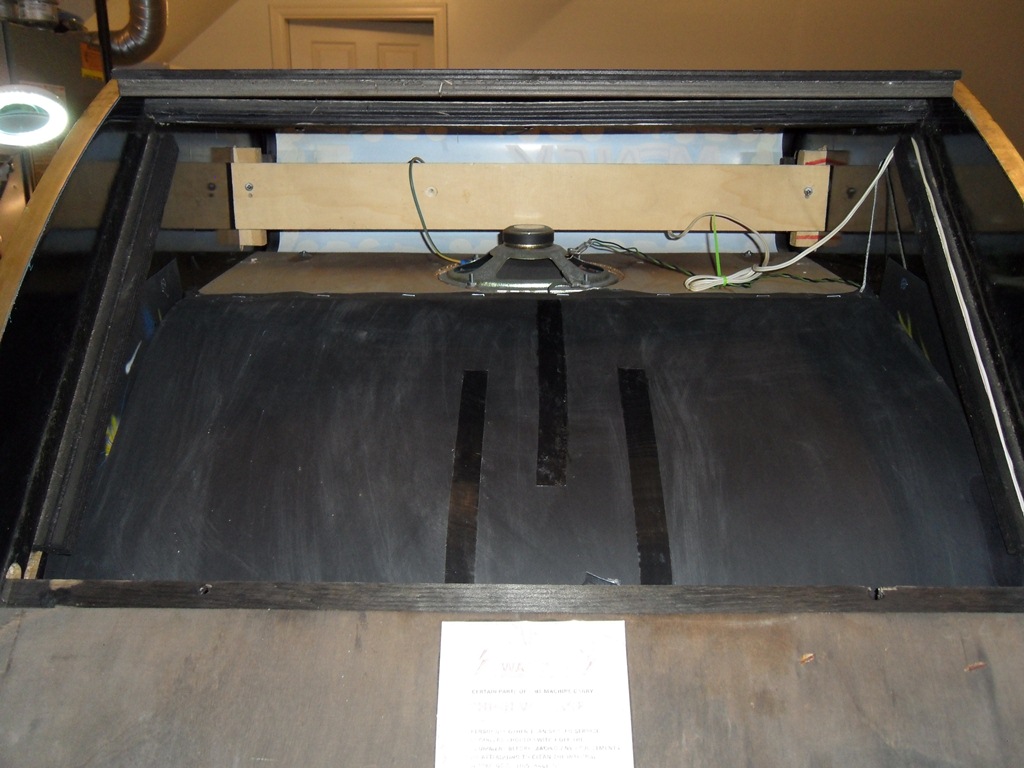
Added in the instruction sheet taken from the EU surround and assembled the curved surface for the application of the curve ribbing based on 10 mil heat laminate applied with a hot iron. This time I applied much less ribbing and only to the curved portion (a lesson learned from the Jackrabbit restoration). The result was much better - though another minor lesson learned was that the instruction sheet and repair patches needed to be applied on the curve as thoses areas are a bit stiff. It's only minor, though.
|
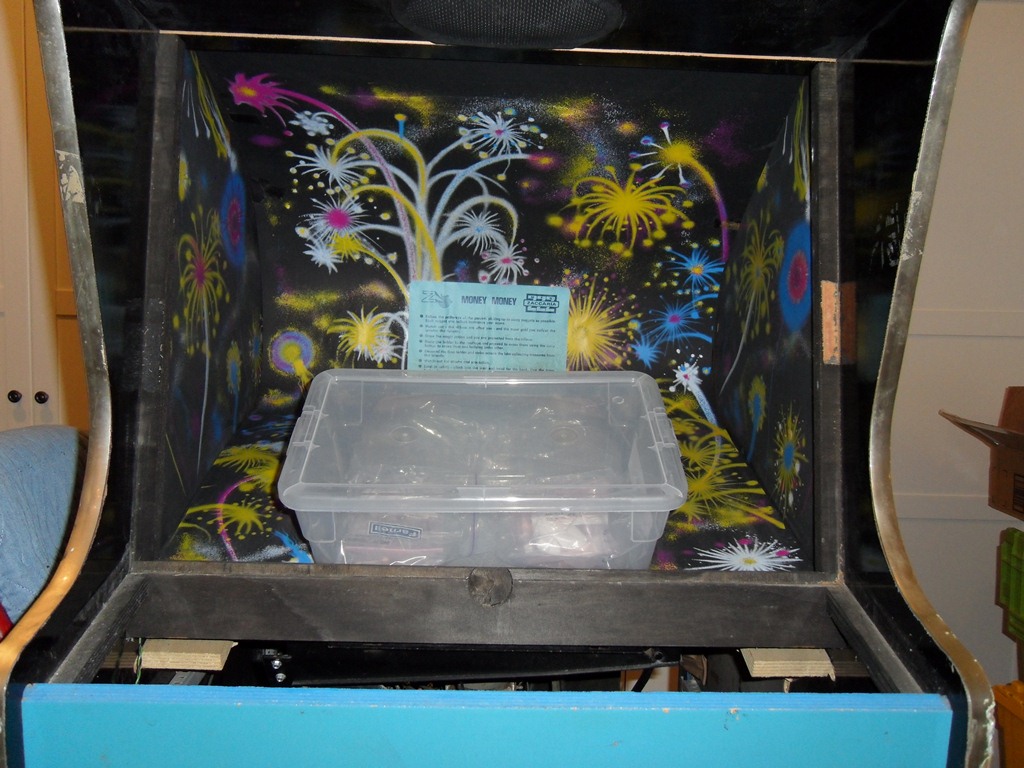
I left the surround loose in the cab for a little while to settle in (the plastic container is holding the thin lower edge down). Finally stapled it in place with the four staples on the viewable sides of the monitor touched up with a black Sharpie to blend them into the black of the surround.
|
Put all the remaining screws into the power brick along with a couple of extra screws on the back door to keep the cab more rigid for transport. Final power on test was OK and it was all finished! :)
|
The brothers reunion :)
|
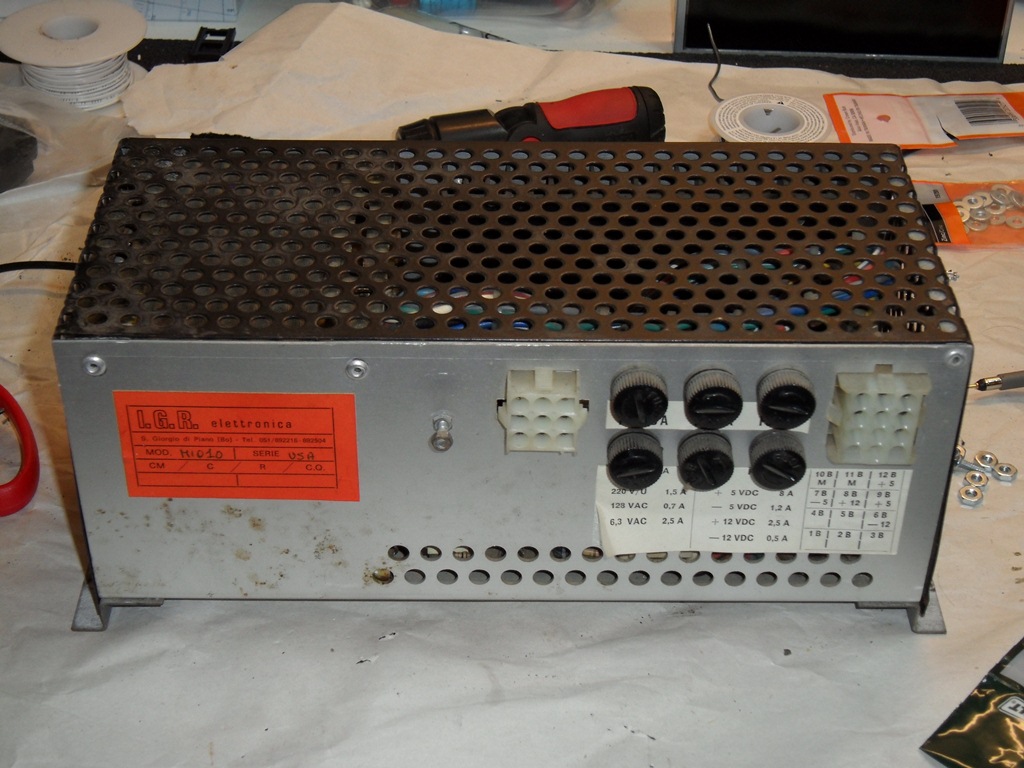
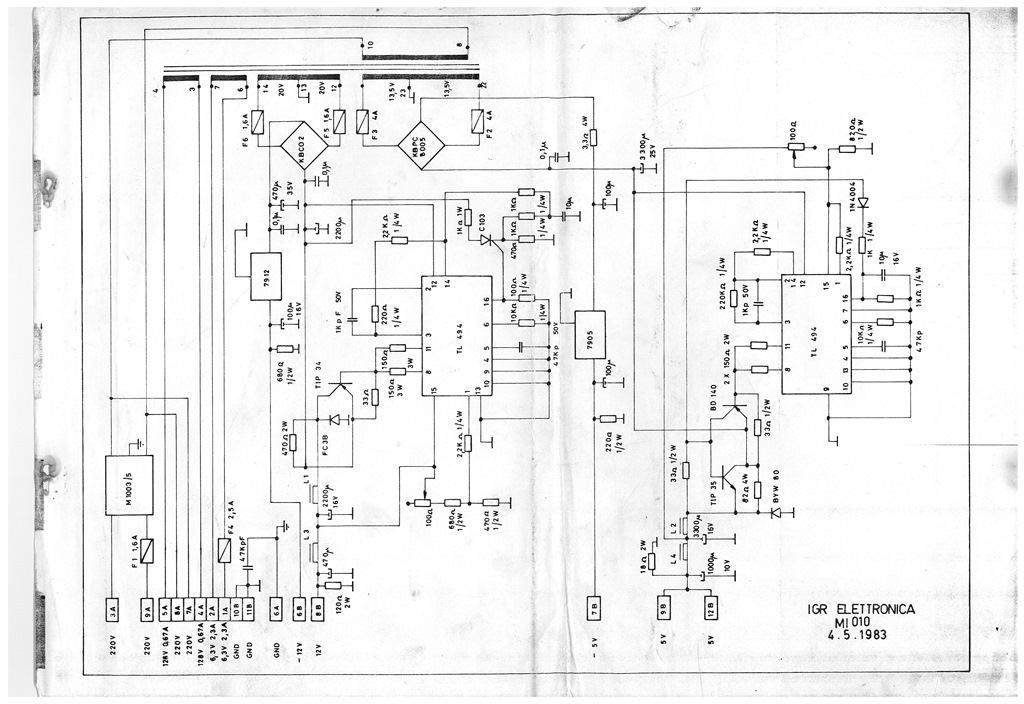
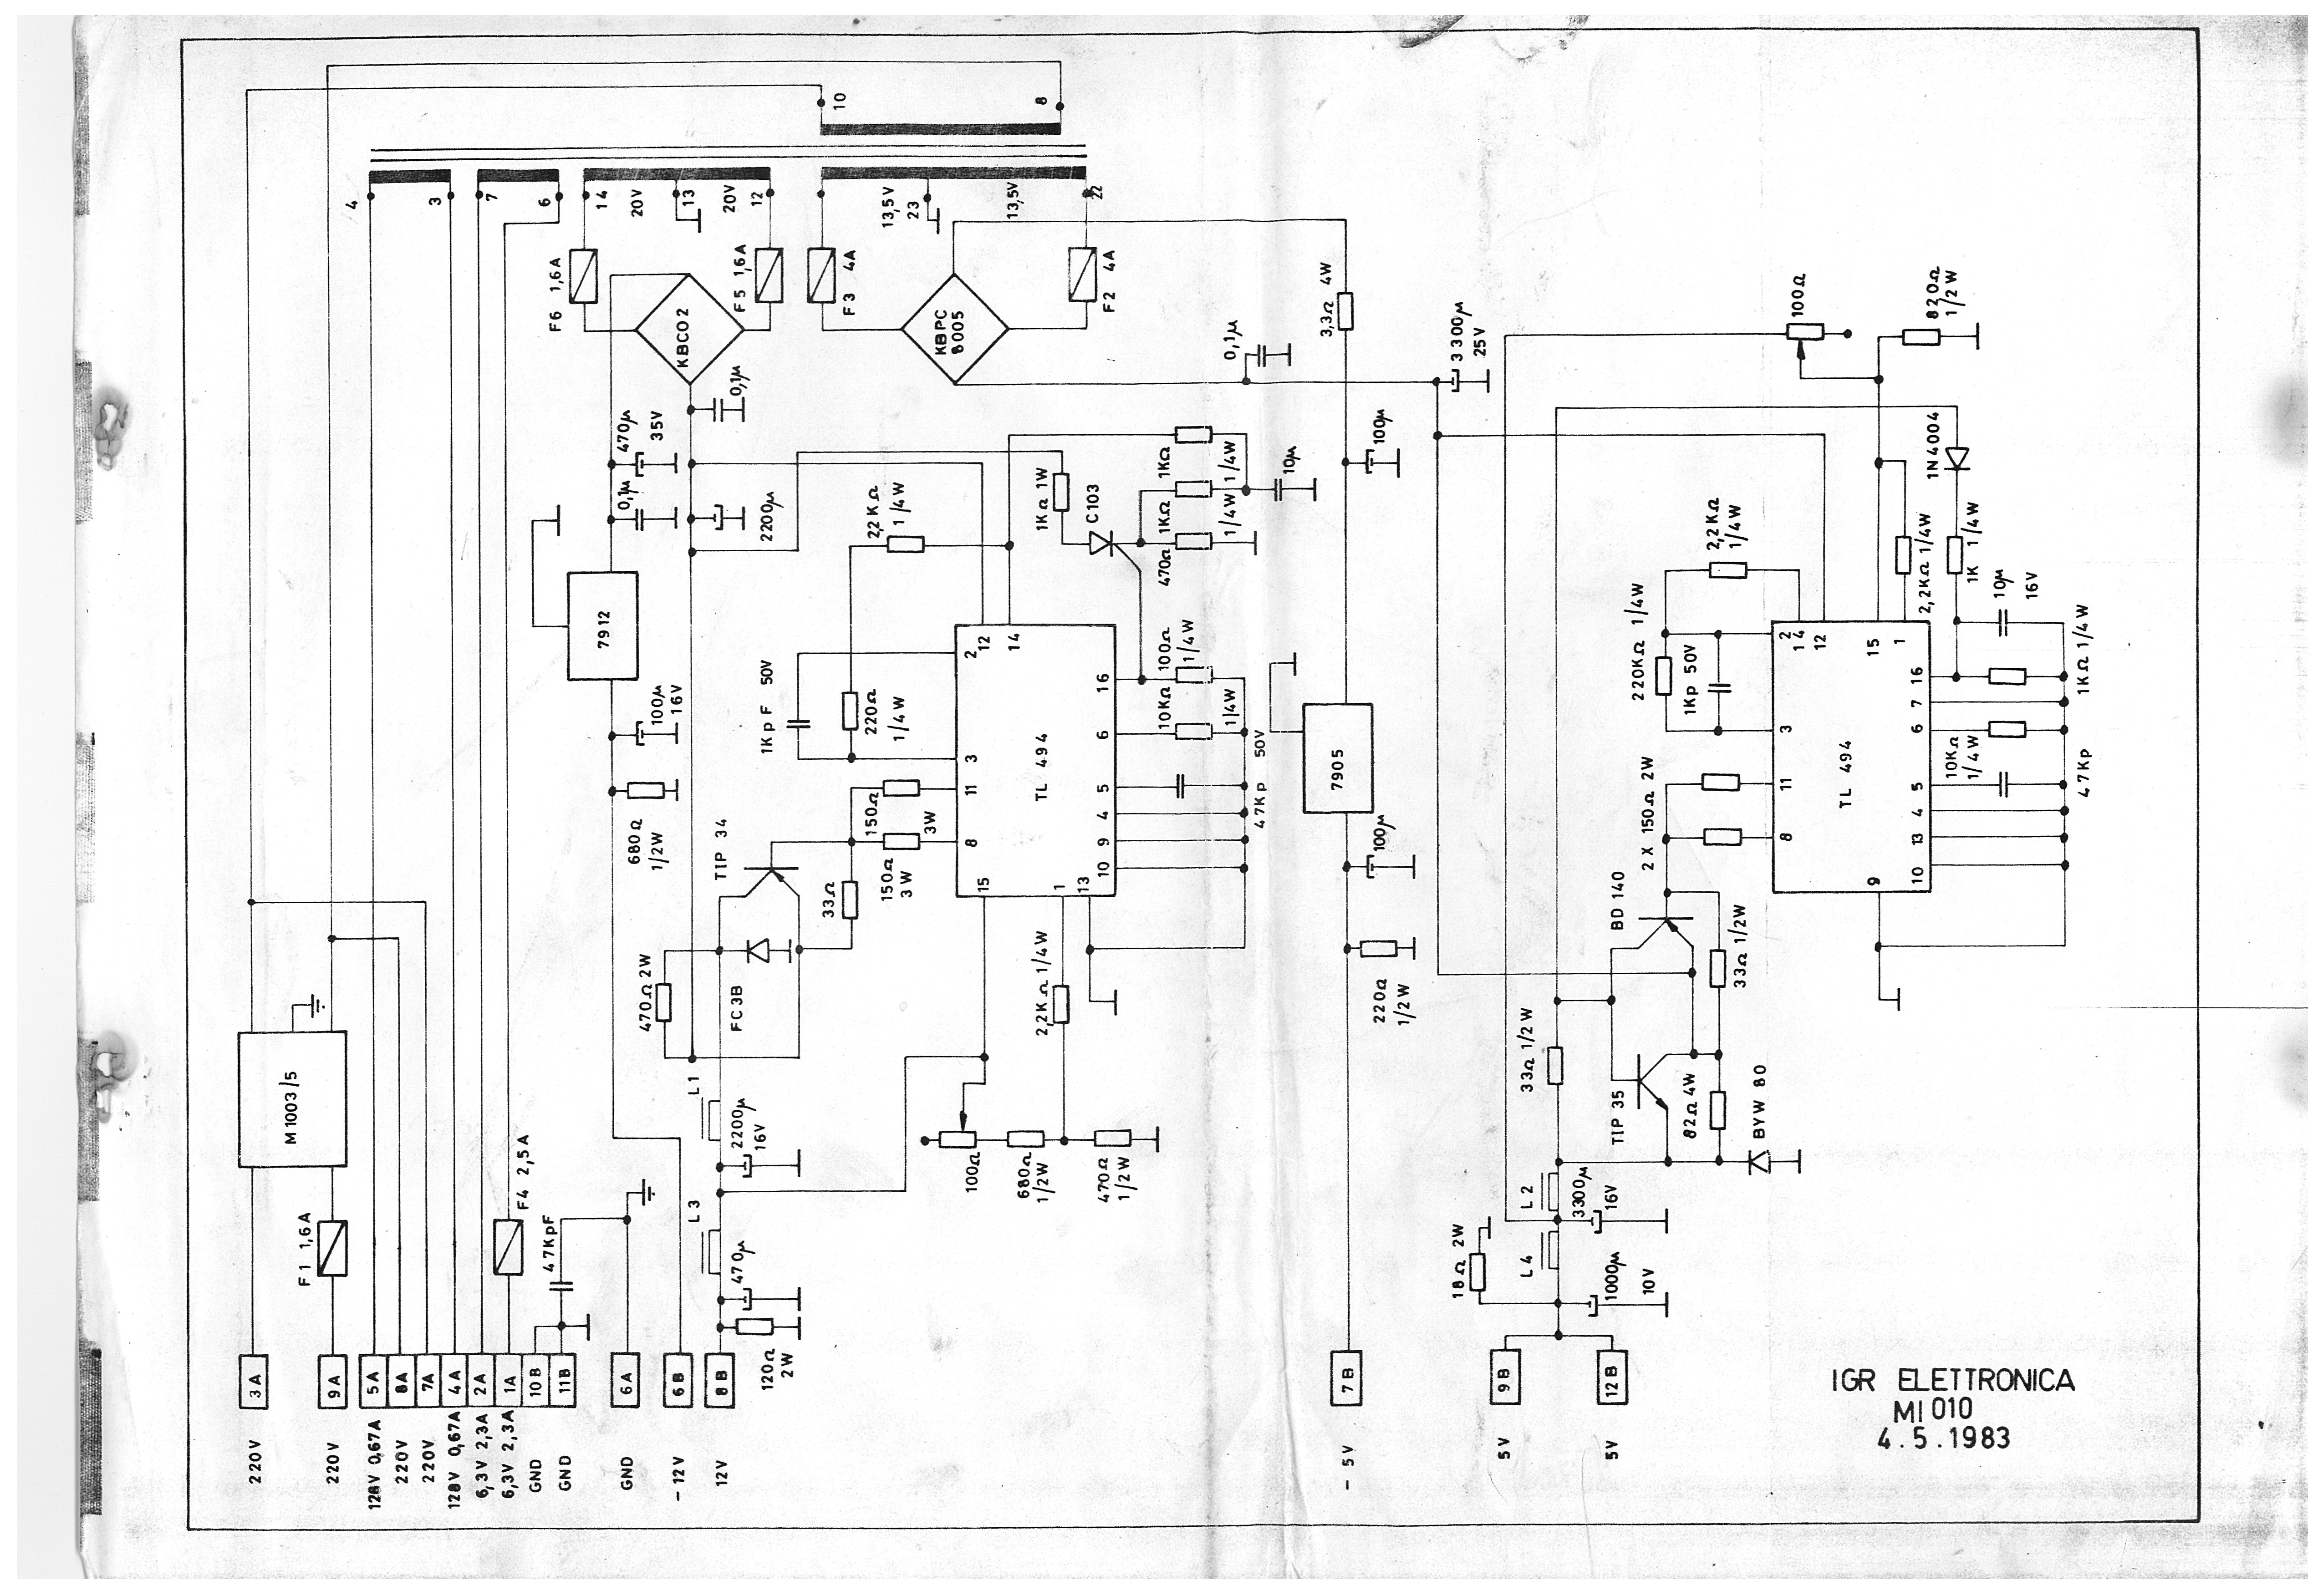
One of the Universal manuals contained the IGR Electronica MI010 power supply schematic.
300 DPI IGR Electronica MI010 power supply schematic scan (3.54MB JPG).